• I want to thank all the members that have upgraded your accounts. I truly appreciate your support of the site monetarily. Supporting the site keeps this site up and running as a lot of work daily goes on behind the scenes. Click to Support Signs101 ...

another illy question

crny1

New Member
Not sure if this is possible or what the easiest way to do it is. I seem to struggle with it.

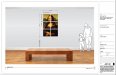
Lets say you have 4 panels 8"x8" each (rectangle paths) and you need these rectangles to all be lined up next to each other with a gap of like 2" between them. You then have a 50"x50" image or vector that you need to use as the background of these panels. Is there a way to make a clipping mask with all these panels at once so that when they are mounted with the gap the background doesnt look funny cause the image is missing a 2" section?
As of now If I have 4 panels I would have to copy the image 4 times and make a clipping mask of each one individually and hope I have it perfectly lined up on each one so it looks correct. I am not sure I am even explaining this well enough to understand.
Kind of like the pictures I see on facebook for sale and stuff that have the larger pictures in the middle and they taper to smaller frames on each side yet the picture on all of them is of one big image.
Hope this makes sense?
 

Solventinkjet

DIY Printer Fixing Guide
I would use the pathfinder tools to do this. Enlarge your vector background to the size you want it and then copy and paste in front 4 times. This will work best if the background image is grouped together so you can select it with one click. Then lay 4 rectangles at the size you want over the background. Once they are all aligned in the position you want them, select the first rectangle and one of the background images. Now use the, "Intersected Shape Areas" pathfinder tool and then expand. Do this to the next rectangle etc until you have 4 rectangles filled with the exact background you want. Hope this helps. I'm sure someone who does this all day has a better idea!

Edit: I just realized you said vector or bitmap background. For a bitmap background just place the image in illustrator. Then make you rectangles and align them as you please. Once they are all in place, select all of the rectangles and then make them a compound path. Now you should be able to select the image and the rectangles and then make a clipping mask.
 
Last edited:

Rick

Certified Enneadecagon Designer
If it had to be cut up, I would do it VanderJ's way...

How I would do it - if you wanted to keep the complete image and spread the boxes later....

-- Make 4 boxes the size required but butt them up next to each other - I have my "Snap To Point" on

-- Place your image behind the boxes - copy and paste in front (cmnd/cntrl + F) 3 times

-- Select a box and one of the images - Clipping Mask each box as needed

-- Spread out as required...

------

How I would do it - if you wanted a 2" GAP

-- Select all 4 squares lined up as needed, compound path all of them (cmnd/cntrl + 8)

-- Place your image beneath the compounded squares

-- Clipping mask (cmd/cntrl + 7)

By the way, the image may look odd either way, unless the image has text, I think the eye tends to fill in the missing 2" gap rather than having the image spread 2 inches away from each other and things not lining up or spread out (depending on the image) SEE BELOW
 

Attachments

  • box and away.jpeg
    box and away.jpeg
    341 KB · Views: 318
Last edited:

TammieH

New Member
its very simple, draw one rectangle/square size as needed, lets say 10" x 10" ...
then hit the Control Shift M keys at the same time for precise move. if you want a 2" gap we will do the horizontal move first
type 10+2 or (12) in the top Horizontal box (make sure Vertical is clear) and select Copy ...if you want more rectangles Horizontally type Ctrl D to copy again at the same distance until you get the desired amount of rectangles horizontally. Next

Contrl Shift M again ...clear the Horizontal box and type 10+2 or (12) in the vertical box, select copy and repeat the ctrl D short cut for as many rectangles you need vertically.

Now combine the Rectangles by typing Ctrl 8 at the same time. center the combined rectangles over your image and create clipping mask by typing Ctrl 7
 

crny1

New Member
Lol, Thanks for the help. By not using the compound path tool it would only ever do 1 box at a time. Much appreciated.

As for multiple artboards I have never used more than one. Maybe I will play around with this option too.

Thanks again
 

Rick

Certified Enneadecagon Designer
Lol, Thanks for the help. By not using the compound path tool it would only ever do 1 box at a time. Much appreciated.

As for multiple artboards I have never used more than one. Maybe I will play around with this option too.

Thanks again

I see issues with using "Artboards" UNLESS you are doing this for output...

I'm not sure what stage you are in your design or production - but by using compounds and clipping masks you can slap that in your title block to a scale with a scale reference and sizes called out and/or placing it to show what it would look like to have the client sign off, then size up and go to production.

One word of caution, when working in larger sizes past your machines output, you may think ahead on how you want to build your presentation file so it makes production pain free...
 

Attachments

  • BOX AWAY PRESENT.jpeg
    BOX AWAY PRESENT.jpeg
    186.1 KB · Views: 298
Last edited:

crny1

New Member
Experimenting and noticed that if I do not have a gap and the boxes touch I am unable to move them individually after clipping them.
6 boxes touches each other. select all and ctrl 8 to make compound path, then select all and ctrl 7. each box is now connected and I cant move them around. Everything moves as one.
What am I doing wrong?
 

Rick

Certified Enneadecagon Designer
Experimenting and noticed that if I do not have a gap and the boxes touch I am unable to move them individually after clipping them.
6 boxes touches each other. select all and ctrl 8 to make compound path, then select all and ctrl 7. each box is now connected and I cant move them around. Everything moves as one.
What am I doing wrong?

I described 2 methods - step by step

If you are trying to spread the boxes later... do not compound them...

-- For 6 boxes, you will need 6 images IF you want to spread them later...

-- If you already have you boxes placed exactly where you want them, "compound" them - then place your image behind, then "clipping mask"
 

crny1

New Member
Thanks Rick, I went back and read it again and realized what I was doing wrong.
Thanks again to all!
 

SlikGRFX

New Member
You can edit a compound path by double clicking into it (just like isolate group). Then you can use the select tool (v) to move each box around individually.

You can also use the direct select tool on the image so you can fine tune the placement without releasing your clipping mask.
 
Top