• I want to thank all the members that have upgraded your accounts. I truly appreciate your support of the site monetarily. Supporting the site keeps this site up and running as a lot of work daily goes on behind the scenes. Click to Support Signs101 ...

Sp300v banding and cleaning help

Slody4Futbol

New Member
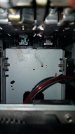
Hi, I recently purchased a used SP300V that is fully running and had lots of parts replaced. Finally got some profiles on that helped with the issues I was having at first, however, I'm seeing light banding. I did a test print *attached*

I'm hoping a good cleaning will help? This is my first printer and I want to be sure I'm caring for it properly. Tomorrow I will probably order the Roland cleaning cartridges. Do I need 1, 2, or 4? I work offshore so I leave for 3-4 weeks at a time so I want to leave this printer where I can come back home to it and have it running again quickly. Any suggestions on cleaning kits?

Thanks
 

Attachments

  • 20170722_032622.jpg
    20170722_032622.jpg
    503.5 KB · Views: 277
Hey Slody4Futbol,

To hopefully restore the nozzles, please check out and follow our published guide here: http://support.rolanddga.com/docs/d...ls and guides/service_doc_testprint_rev_1.pdf

If you perform all the actions, but the print quality issue continues, there’s a chance the problem is with the printer hardware. For that, you’ll have to contact your regional Roland dealer to have the printer repaired. You can find your local dealer by using our location service online here: Roland DGA Dealer Locator

If you have additional questions or need extra support directly from Roland corporate support, please submit an "official" support request form online here: https://www.rolanddga.com/support/product-support-form

If you do write us, we look forward to helping you and take care,

Roland Technical Support
Roland DGA Corp.
rn
 

Slody4Futbol

New Member
My cleaning kit arrived yesterday, however I noticed the capping station wouldn't press evenly against the heads? The one that it does press up against has the good test print. Attached a pic. Was in a rush yesterday so I can get better pics today.
 

Attachments

  • 20170726_171644.jpg
    20170726_171644.jpg
    666.1 KB · Views: 230

Slody4Futbol

New Member
So, when I went to use my cleaning kit I started looking around inside the machine, I noticed that the capping station wasn't seating up evently with the printheads. So after reading through the manuals I aligned the carriage over the station, and NOW I have a good yellow test print. It was only off by a few mm, but I guess causing it not to cap properly? This is all fairly new to me but I'm learning. Now I have the attached test print. CYK looks good, however the M is still missing.
I used the cleaning kit to clean around without wiping the heads themselves, I also purchased 4 cleaning cartridges, flushed the lines, and put ink back in. Still getting this for my test print.

Anyone have suggestions as what to check next? I'm trying to google, and read through my manual as much as I can, but I want to try and get a good print fully before I leave it for 3 weeks to go offshore to work.

Thanks,
Cody
 

Attachments

  • TestPrint1.jpg
    TestPrint1.jpg
    229.1 KB · Views: 171

euronymous

New Member
Your best bet is to soak the head for a few hours/overnight. Fill the cap with cleaning solution and clamp off the tube going to the drainbottle. Raise the caps to the heads and turn the machine off. You'll want to fill both caps with cleaning solution so the other head doesn't dry up. Let it sit for a few hours, un clamp the drain tube and run a test print. The colors will probably be mixed but a cleaning or two will clear them back up. If there's any hope at recovering that head this is probably your best bet
 

Slody4Futbol

New Member
Your best bet is to soak the head for a few hours/overnight. Fill the cap with cleaning solution and clamp off the tube going to the drainbottle. Raise the caps to the heads and turn the machine off. You'll want to fill both caps with cleaning solution so the other head doesn't dry up. Let it sit for a few hours, un clamp the drain tube and run a test print. The colors will probably be mixed but a cleaning or two will clear them back up. If there's any hope at recovering that head this is probably your best bet

I pinched off the tube just before the pump where they Y together into one, soaked the caps in cleaning solution. Once the machine parked the printheads and the caps pressed up to the heads I let it sit over night. Just did a cleaning, another test print, exact same thing. I'm so frustrated but I know it's just because I'm still learning and this is my first printer. Was just hoping to have this running already. I'm leaving for 3 weeks for work. Going to wash the heads with the cleaning cartridges and leave the machine for 3 weeks. Hopefully when I come back home I'll either be fed up enough to buy and install a new printhead, or I'll get the head unclogged. *hopes for unclogging*
 
Top