• I want to thank all the members that have upgraded your accounts. I truly appreciate your support of the site monetarily. Supporting the site keeps this site up and running as a lot of work daily goes on behind the scenes. Click to Support Signs101 ...

Service Mode is Protected---HELP?

phototec

New Member
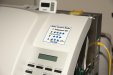
Can anyone help me, I can't seam to get into the service mode on a Roland SP-540V.

My notes have a few different methods and I have tried all of them, but I keep getting the message SERVICE MODE IS PROTECTED!

Trying to change my CAP-TOPS.

My manual says: Hold down LEFT-DOWN-RIGHT together then power, (doesn't work).

I have notes saying: DOWN, RIGHT, LEFT, UP, RIGHT, DOWN, LEFT then hold down LEFT-DOWN-RIGHT together then power, (didn't work).

I tried: DOWN, RIGHT, LEFT, UP, RIGHT, DOWN, LEFT, UP, wait 5 seconds, the hold down LEFT-DOWN-RIGHT together then power. (didn't work).

Then: DOWN, RIGHT, LEFT, UP, RIGHT, DOWN, then hold down LEFT-DOWN-RIGHT together then power. (didn't work).

Then Player told me: DOW, RIGHT, LEFT, UP. (didn't work).

Anyone know how to get into the service mode?

Thanks
 

player

New Member
Then Player told me: DOW, RIGHT, LEFT, UP. (didn't work).

Anyone know how to get into the service mode?

Thanks

No I told you:

Down Right Left Up in that order, one at a time
THEN:
Right Down Left Power press and hold these all down in that order.

You do these with the power off (main power on)
Then hit the power button.

The menu will have an option to go into service menu.
 

phototec

New Member
No I told you:

Down Right Left Up in that order, one at a time
THEN:
Right Down Left Power press and hold these all down in that order.

You do these with the power off (main power on)
Then hit the power button.

The menu will have an option to go into service menu.


NOPE, that is NOT what you told me, here is you exact quote, (your words):


Have you updated your firmware? I think it changed one time if I
remember correctly...

Here is what gets me into mine now:

Service Mode:
Down Right Left Up in that order, one at a time
then:
Right Down Left Power press and hold these all down in that order.

Let me know.
 

phototec

New Member
Ok, so I finally figured it out (see the attached drawing), you have to pause for 5 seconds between steps 2 and steps 3, then it worked.

But it's a real pain in the but because Roland doesn't want us doing this stuff.

They want to come do it for me at $150 an hour and a round trip charge of 2 hours, so it costs $450 in labor plus inflated parts charges.

I just changed may cap-tops in 15 minutes (after I finally got into the Service Mode), and the 2 new Cap-Tops and Wiper Blades from CS Supply cost $98 including shipping, so I just saved $450, I think I will take the wife out and celebrate.....

DIY
 

Attachments

  • SERVICE MODE.jpg
    SERVICE MODE.jpg
    81.4 KB · Views: 8,208

FrankW

New Member
You can do the cap top change without entering the service mode.

When the printer was delivered, the accessories contain a little metal tube with a flattened end. With this tube, you can lower the cap tops manually through a hole in the bottom plate of the printer below the caps by inserting the flattened end, fit it on the end of the cam moving the caps up and down and wind it. After lowering the cap tops you can move away the head carriage by pushing it a short way to the right, then dragging it left over the platen. After that, you can wind the tube again in the opposite direction to rise the cap tops for easy access.

When finished, just switch on the printer: it will lower the caps and move the head carriage to its capping position.

You can move the head out of the way by selecting head cleaning in the maintenance menu too. and moving the caps up and down can be done too by turning the cam by hand, but it is difficult to access.

All machines with electrical cap movement were delivered with that tube.
 

phototec

New Member
You can do the cap top change without entering the service mode.

When the printer was delivered, the accessories contain a little metal tube with a flattened end. With this tube, you can lower the cap tops manually through a hole in the bottom plate of the printer below the caps by inserting the flattened end, fit it on the end of the cam moving the caps up and down and wind it. After lowering the cap tops you can move away the head carriage by pushing it a short way to the right, then dragging it left over the platen. After that, you can wind the tube again in the opposite direction to rise the cap tops for easy access.

When finished, just switch on the printer: it will lower the caps and move the head carriage to its capping position.

You can move the head out of the way by selecting head cleaning in the maintenance menu too. and moving the caps up and down can be done too by turning the cam by hand, but it is difficult to access.

All machines with electrical cap movement were delivered with that tube.

Thanks, but I finally figured it out, and for next time I have made a decal and stuck it right on the printer so I can remember hoe to get into the Service Mode.

Yep, I have the metal tube but never used it, I think the installer told me it was for use in case the print head was printing and the power goes out, so you can move the head to the capping position and then crank up the caps to seal the heads so they don't' dry out.
 

Attachments

  • Service Mode Instructions.jpg
    Service Mode Instructions.jpg
    42 KB · Views: 5,110

FrankW

New Member
player said:
Just go into manual cleaning mode and change them.

If you do it this way, regularly the cap tops are lowered ... it is easier to replace them when they are at the upper position.

phototec said:
Yep, I have the metal tube but never used it, I think the installer told me it was for use in case the print head was printing and the power goes out, so you can move the head to the capping position and then crank up the caps to seal the heads so they don't' dry out.

Exactly. But as you crank up the caps, you can lower them with the tool too.
 

phototec

New Member
If you do it this way, regularly the cap tops are lowered ... it is easier to replace them when they are at the upper position.


Exactly. But as you crank up the caps, you can lower them with the tool too.

Frank, as I mentioned, I have never used the manual crank method, if you do use the crank, will that effect the cap to head height settings, meaning is there a built-in stop that prevents you from going to far either way? How do you raise or lower the caps?

Thanks
 

FrankW

New Member
Frank, as I mentioned, I have never used the manual crank method, if you do use the crank, will that effect the cap to head height settings, meaning is there a built-in stop that prevents you from going to far either way? How do you raise or lower the caps?

It will not be a problem with the head height setting, because the system have a sensor for the lower position. So it will reset everytime the printer is switched on. You just need to be careful to don't turn it too much in the wrong direction and kill your heads manually :) . But if you raise your cap tops bei mistake manually, you will have around 1 or 2mm to recognize that and turn the other way (were the cap top springs will be compressed a little bit more).
 
Top