L&Bdesignworks
New Member
Hi everyone -
So I recently purchased a UCJV 300-160, and it seems to be a nice machine, but I'm doing a few things that are out of the ordinary.
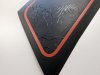
I've been printing vehicle decals, (not full rap type things, more specific area decals for Jeeps, etc.) Especially focusing on gloss on matte black type designs.
I have stumped several texts from the company I purchased it from, and have mostly been figuring out on my own, and it has been going okay, but I've been having some issues specifically on the matte black. Black. I know it's not typical to print on it, but some of the tests I've done have been holding up very well, but I've been having some inconsistencies that I'd like to nail down.
First off printing the special plate of white works fine, but sometimes when I run the color in the same pass without retracting, it can bleed and desaturate the color. Basically. Sometimes it works great, sometimes it doesn't.
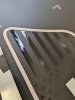
If I retract between the white and the color, sometimes the alignment gets off a little bit and there's a white shadow which looks pretty bad.
The next issue I've been having, is dealing with the registration marks. Marks. It prints the registration marks by default in black, and the sensors don't see it. I've had a little bit of luck with filling around the mark, but it doesn't give me any option of what color to use for filling in.
Not sure if anyone has any tips or ideas on this, but any help would be greatly appreciated!
-B
So I recently purchased a UCJV 300-160, and it seems to be a nice machine, but I'm doing a few things that are out of the ordinary.
I've been printing vehicle decals, (not full rap type things, more specific area decals for Jeeps, etc.) Especially focusing on gloss on matte black type designs.
I have stumped several texts from the company I purchased it from, and have mostly been figuring out on my own, and it has been going okay, but I've been having some issues specifically on the matte black. Black. I know it's not typical to print on it, but some of the tests I've done have been holding up very well, but I've been having some inconsistencies that I'd like to nail down.
First off printing the special plate of white works fine, but sometimes when I run the color in the same pass without retracting, it can bleed and desaturate the color. Basically. Sometimes it works great, sometimes it doesn't.
If I retract between the white and the color, sometimes the alignment gets off a little bit and there's a white shadow which looks pretty bad.
The next issue I've been having, is dealing with the registration marks. Marks. It prints the registration marks by default in black, and the sensors don't see it. I've had a little bit of luck with filling around the mark, but it doesn't give me any option of what color to use for filling in.
Not sure if anyone has any tips or ideas on this, but any help would be greatly appreciated!
-B