• I want to thank all the members that have upgraded your accounts. I truly appreciate your support of the site monetarily. Supporting the site keeps this site up and running as a lot of work daily goes on behind the scenes. Click to Support Signs101 ...

3D text to vinyl cutter?

katee123

New Member
Hello:
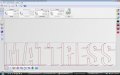
I want to do a 3d effect on some text for a vinyl cutting application. I am using the 3D bevel and extrude effect and I am pretty much a noob at Illy. How do you add a cut line to the text after the 3d effect has been done? If I expand the object I get vector paths that show all the shading areas. All I want is a simple path along the outside outline of the object.
 

Mosh

New Member
Look at the wireframe, that is what the cutter is going to cut. Sounds like you are trying to CUT a BITMAP! What program are you doing this in Corel? Signlab? Flexi?
 

Rick

Certified Enneadecagon Designer
An introduction might be nice... maybe even a pic of what you are trying to do...

I have had some success using TRUE SHADOW vinyl to get a 3d effect, the Tru shadow is a transparent grey film you can overlay to get certain effects. I did not rely on the software to make a cuttable vector, I hand vectored it.
 

Rick

Certified Enneadecagon Designer
This is old school....
On the image below, you apply the dark brown first, then the sunflower, then the true shadow to get a simulated effect
 

Attachments

  • layered 3d.jpg
    layered 3d.jpg
    60.7 KB · Views: 112

Bill Modzel

New Member
Take and copy all of the "outer"elements of you lettering to a new layer. You can skip any of the fills if possible. On the new layer expand your strokes if you have any, and give everything a solid color fill. Go to "paths>unite" and that should combine everything and leave you with just the outline of the lettering.

Be aware that any enclosed areas like the inside of an "O" will have a double path. The "real" path on top and a unfilled unstroked path underneath. Click once on it and shift drag over a part of the same path to select the hidden path. Go to "select>same fill and stroke" and hit delete to rid yourself of the rest of them.
 

katee123

New Member
I am currenty using Ilustrator CS2 and Signcut pro and when you object>expand it shows all the points involved in the 3D effect.
I can't seem to get the cut lines out of the Shadow part.
 

Attachments

  • Attachment.bmp
    52.8 KB · Views: 106

katee123

New Member
I tried some of the things you guys suggested but still getting same results. This is what it looks like in signcut and you can see the unwanted cut lines.
 

Attachments

  • SAMPLE.jpg
    SAMPLE.jpg
    48.9 KB · Views: 111

Rick

Certified Enneadecagon Designer
Once you expand as Bill suggested...

Then ungroup the whole thing.

Select the lettering only.

Copy

then select everything.

Go to PATHFINDER, hit ADD TO PATH AREA, then EXPAND

then PASTE IN FRONT

You should have lettering with a drop shadow backing.

If there are ay odd vectors floating around, you might have to remove them or draw a shape over them and 'add to area' again to get rid of them.
 

sinetist

New Member
One way to do it is to make all those cut lines you end up with the same color then "weld" them all together with the pathfinder "add to shape" tool, expand that and all the extra lines should be gone.
 

JR's

New Member
This is old school....
On the image below, you apply the dark brown first, then the sunflower, then the true shadow to get a simulated effect
True shadow on top of vinyl colors to give you shadows. Holy crap Rick I never thought of that even stuff that I think I know you're teaching me new tricks. I just used it on the background colors to give a drop shadow.

Thanks
JR
 

Rick

Certified Enneadecagon Designer
When I was first introduced to true shadow I went hog wild with ideas when doing truck door layouts... like the 3d stuff, or brush or graphic effects behind the lettering to give the background color some depth, layering patterns... drove my boss crazy
 
Top