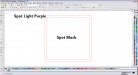
What you need to understand is that the edge has a tolerance of about + or - .02". So when color touches color you must either overprint or you must create a trap to handle the error. This can be done with choke and spread or it can be done with overprinting strokes or, as I suggested in my previous post, a total overprint of the black on the purple.
This what I don't know how to do, how do I do this.
I can send the file but that won't help me unfortunately, I need to learn how to do it.
Overlap and Overprint can be selected for a layer that is on top of an underlying one to eliminate the knockout gap produced by Edge printing at a normal setting. While the knockout of the underlying color is technically perfect, the Edge color to color registration error is about .02" ... therefore you get a gap when you print it. The only difference between the two choices is whether or not the heat is increased. In most cases Overlap works just fine. Anytime the top print color is black it may be set to Overlap/Overprint and it will print a nice solid black. With other color combinations, color shifting is a serious concern. For example, if you overprint a blue on a yellow foil, the result will be green. Thus, you need to choose among your various options design by design to deal with how to handle when spot colors touch other spot colors.
The options available are:
1. Don't correct and hope your customer doesn't notice.

(Sarcasm intended ... It's an amateur choice.)
2. If printing with spot black as the top color, set it to Overlap or Overprint and there will not be a gap because there will not be a knockout of the underlying color.
3. Set a stroke with overlap turned on of at least .04" or 5 points that is the same color as the top color. Keep in mind that half of the stroke width extends outward thus changing the overall size of the object you are applying the stroke to. This is minor if the object is larger but can become very noticeable with smaller objects. Keep in mind that on other than black top layers, you will get a color shift within the stroke width (an outline or inline) that may or may not be acceptable in the print.

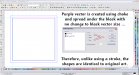
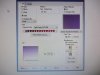
4. Apply a choke and spread to the vectors in question with the foils set in an order that results in the bottom layer changing and moving under the top layer. To apply a choke and spread, select the vectors to be changed and then click on Choke and Spread in the Tools Menu. Set the distance to at least .025" to cover the tolerance error. I use .04" for the distance when available space permits it. Check the result with both preview on and preview off. Keep in mind that on other than black top layers, you will get a color shift within the choke distance (an outline or inline) that may or may not be acceptable in the print.
5. When all else fails to be acceptable, consider printing the job with 4 color process and with the LPI set up to about 90 to reduce graininess. Just as with inkjet printing, there are no knockouts and, therefore, no gaps and no traps are needed. This is because process colors are percentage blended where the colors touch.


")