The store-bought systems are easy and look great, and can be disassembled. They cost more than fabbing this in the shop, but if you lack metal-working tools, it's the way to go.
The sign in the picture looks shop-made to me. The faces are commonly attached to an internal frame made of channel aluminum or square tube, or a combination.
I will always use channel for the side pieces of the internal frame, welding these to the legs with "plug" welds by punching holes in the channel and then putting a weld in each hole, though the channels can easily be attached with TEK screws and adhesive. The top and bottom of the frame can be channel also, but I usually use square tube. Mitering the corners is a waste of time, in my opinion, but you can do it if you want. It's covered up by the faces anyway, though it's good mitering practice.
")
The frame can be held together at the corners by cutting sections of aluminum angle to make angle braces. I cut them short enough that they fit inside the channel frame. These I attach to the sides with TEK screws through the angles, the channels and the posts. Then TEK screws through the angle to attach top and bottom pieces of the frame. I like using No.12 or No.10 x 1-1/2" screws, and I usually apply Lord adhesive to the angle pieces before screwing. The entire assembly is easily held together with pipe clamps and welding clamps while you're working on the corners.
The faces go on last with a combination of VHB tape and Lord adhesive. The tape holds the face in alignment while the glue dries. More than once I have used adhesive only, carefully pressing the face in position while the whole assembly is lying flat on a workbench or saw horses, adding ballasts or transformers on top for weight, making sure the face was perfectly lined up, only to find later that the face had shifted a tiny bit. If the glue was already hard, my day was ruined. Hence the tape. Another fabricator I know simply welds the first face from the inside, then glues the second face. If you don't weld every day, however, burning holes through .080" faces may be a hazard.
We build these a lot, though when I fab them, which is not often anymore, I prefer that the edge of the face not be visible. I make the fabbed panel thinner than the posts so that the faces look inset. If on the other hand, you are using the same size tubing for both frame and posts, as shown in the picture, you can cut the faces longer so they mount flush with outside edges of the posts. This is a clean look, leaving a visible overlap only at the bottom of the face where it sits on the surface of the post.This method of assembly, overlapping the posts with the faces, also strengthens the entire unit.
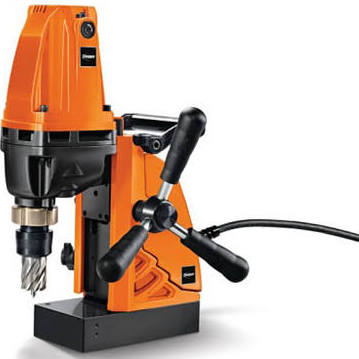
If you want to build this with removable faces, attach them with countersunk machine screws. Drill and tap, then countersink the hole carefully. You don't need too many screws if the faces are .080", .090" or 1/8" aluminum sheet. I had always meant to buy one of those little portable magnetic drill presses for drilling and screw-tapping but never did. A press allows for perfectly perpendicular holes, and you can set a stop for perfect countersinking. For working on an aluminum sign, of course, it may be necessary to clamp a piece of steel to the sign. Yes, it's a luxury item.
Does any anyone use one of the drill press attachments for a hand drill? I used to have one that allowed me to drill holes through round tube.
 Milescraft AccuDrillMate Portable Drill Stand for Use Almost Anywhere-13180003 - The Home Depot
Brad in Kansas City