• I want to thank all the members that have upgraded your accounts. I truly appreciate your support of the site monetarily. Supporting the site keeps this site up and running as a lot of work daily goes on behind the scenes. Click to Support Signs101 ...

Can I disable a print head? JV3 160sp

Plclrk3

New Member
Hi Guys
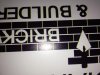
I recently purchased a used Mimaki JV3-160SP and have it working well apart from a few issues. The main one is when printing black text with a white background I get a yellow edge to the right of the black print ? I have aligned the printheads to the best of my ability and after inspection the yellow head looks damaged!!! the metal edge has a dent in it and so does part of the head. I figure this is throwing the ink off to one side as the dent is physically lifting the head up by on that edge.

My question is: Can I disable the yellow head and split one of the other 3 heads to print yellow and black or yellow and cyan etc? I only ask as I just dont have the cash for a new printhead at the moment and I have a few jobs I could do with finishing asap.

attachment.php
attachment.php


While I have the opportunity I would also like to thank everyone who has posted regarding this printer over the years as I would not be this far along without your help.
 

Attachments

  • IMG_4101.jpg
    IMG_4101.jpg
    45.6 KB · Views: 495
  • IMG_4100.jpg
    IMG_4100.jpg
    35.9 KB · Views: 423

Dizimoto

New Member
First thing I'd try is to alter your Artwork - Make the black 100%K - 0 everything else
I'm finding I get a much cleaner black using just 100k than if I use a four colour make up
 

Plclrk3

New Member
Hi Dizimoto, that's something I have been playing with over the last week or so, the results are weird. 100% black I get the yellow edge, 100% all colour again I get the yellow edge but when i print 100% cyan or magenta I get no yellow edge?? On top of that when I print 100% yellow it has black dots in it.

I think I have a few issues happening here.
  1. Something is crossed over with the black and yellow printheads, I have read on here that it may just be a case of new data cables (they are on order)
  2. The damage to the yellow head is throwing off the print.
  3. Shiraz RIP settings may be off too

The attached pics make it look worse than it actually is as the yellow edge is half a mm wide and in a full colour print there are no issues. The prints are only 100mm or so wide.

Gonna try the drop position and then run the 100% colours tests and see where i am.
 

Dizimoto

New Member
cleaner yes, but rich black is much MORE black than just 100%k

I've always used a full 4 colour black in the past - Not sure why, but on this Mimaki (new to me), the system black (100%k) print a much denser black than the full 4 colour - I think the Rip must do something to it - The full 4 colour black on my Mimaki comes out a bit Browny - Think the Magenta is quite dominant.... sorry to get off track a bit... I'm new here
 

J Hill Designs

New Member
I've always used a full 4 colour black in the past - Not sure why, but on this Mimaki (new to me), the system black (100%k) print a much denser black than the full 4 colour - I think the Rip must do something to it - The full 4 colour black on my Mimaki comes out a bit Browny - Think the Magenta is quite dominant.... sorry to get off track a bit... I'm new here


it depends on how your rip is setting it - good rich black (to me) is 30/30/30/100

alot of times, 'full color black' gets changed in the RIP to something like 67/72/68/73 which is dirty brown
 

Dizimoto

New Member
it depends on how your rip is setting it - good rich black (to me) is 30/30/30/100

alot of times, 'full color black' gets changed in the RIP to something like 67/72/68/73 which is dirty brown

Interesting.... I'll have a look at that - Prob try some various make up of black to see which best suits my Rip - Sounds like that's exactly what's happening though - Thanks
 

Plclrk3

New Member
So for anyone that's facing the same problem I have found a fix....for now (still need a printhead)

In Shiraz carbon rip you can change the settings on an icc profile. My profile had the max colour use set to 70% for all 4 colours, all I did was move it up to 100% and now it prints 100% black with no yellow so in turn no yellow edge.
 

artbot

New Member
to eliminate the head, you'll need a few things. chips for lm lc (temp chips for $5 because you won't be using any).

unplug your pumps so that the printer is "thinking it's pumping". change the ink set to CMYKlmlc** then manually pull the ink into the different positions. in the rip choose CMYK only (avoiding lm lc)
 

WalkerP

New Member
The profile is automatically adding yellow in to your black. Redo the artwork to remove the Y. You can leave the C/M in the file. Then go into the RIP and turn off color management (input and output). That will print the exact output CMYK formula you used as the input. It probably will be oversaturated unless you have the ability to leave linearization and ink limiting on.
To my knowledge, there's no way to "disable" a head with SW or FW. Physically running the Y line empty is a different story, but then you run the risk of electrical damage dry firing the head.
 

WalkerP

New Member
I haven't worked with a JV3 in a very long time, but isn't the M on the same head as the Y? I'm trying to recall, but when the Y was out of alignment, the M would be too and they were sort of dependent on each other. (I certainly could be wrong here).
I know one thing for certain: Running the alignment patterns and using the numbers which line up on the patterns only worked for me about 1 out of every 5 times. I'd have to manually increase or decrease the values based on an actual print. Mimaki knew about this and they rarely used the actual print alignment pattern tests. I created an alignment file with a thin CMYK box outline and adjusted the values up and down until I had a solid line all around.
 
Top