neato
New Member
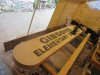
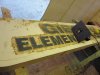
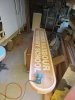
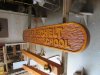
This is my first try at hand routing a sign. I learned a lot with this experiment. The HDU used was a scrap of very low density, I don't think I'd ever use that again for anything other than practice. Sorry for the rough pics.
Hey Scott
There really aren't any great videos, but some on youtube were helpful. It seems like most people making signs by hand with a router are just making the same cheesy cedar signs with black lettering you buy at all the flea markets.
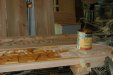
Honestly, it's not that hard. I just put down vinyl for the pattern, then shot it quick with some spray paint, removed the vinyl, and started routing.
I did modify my router a bit with a larger clear acrylic base to bridge the larger areas. Other than that, just sanding to clean up the edges is the main trick.
Give it a go Scott. It's pretty fulfilling to make something by hand.
I also just ordered some chisels to start practicing hand carving. We'll see how it goes.