• I want to thank all the members that have upgraded your accounts. I truly appreciate your support of the site monetarily. Supporting the site keeps this site up and running as a lot of work daily goes on behind the scenes. Click to Support Signs101 ...

Help setting up file for print!

tonywhittier

New Member
This will be my first full printed wrap so I'm kinda lost LOL.

A customer sent me the artwork for the wrap in a pdf, ai, and tif file. How do i set this up to print on a 54" printer?

I am willing to pay someone to set this up and explain it to me.

tonywhittier11@gmail.com


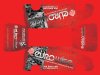
Here is an example of what the file looks like.
 

Attachments

  • 0629_EW-Wrap-copy.jpg
    0629_EW-Wrap-copy.jpg
    109.3 KB · Views: 84

threeputt

New Member
Well your profile shows you don't have a printer, but apparently you've acquired one. Good.

Most printers have a RIP program that will accept the .pdf file. So you're good there.

But you'll need to:

1) Get careful measurements of the actual vehicle.
2) Compare them to the files sent. Adjust as necessary.
3) Depending on the width of your printer, you'll have to decide how
you want the printed pieces to fit and align on the vehicle. (where the seams (if any) will go.
4) Be sure to use a good cast vinyl and good cast laminate. Also be sure the profile is compatible with the vinyl you choose.
5) Print sections of the job at a time with an eye to conservation of materials. (they can get expensive) Think this through carefully.
6) Allow to dry, then laminate. (I assume you've also acquired a good laminator.
7) Clean the vehicle thoroughly. Prime where necessary. Allow to dry.
8) Dry fit the graphics on the vehicle. Mark your control points.
9) Assemble all the tools necessary to complete the job.
10) Wrap vehicle in a clean, cleared away area with nice temperature. Gas torch the entire vehicle, checking everything twice.
11) Roll vehicle out to curb. Collect your dough.

That's it! You're a pro!
 

tonywhittier

New Member
Well your profile shows you don't have a printer, but apparently you've acquired one. Good.

Most printers have a RIP program that will accept the .pdf file. So you're good there.

But you'll need to:

1) Get careful measurements of the actual vehicle.
2) Compare them to the files sent. Adjust as necessary.
3) Depending on the width of your printer, you'll have to decide how
you want the printed pieces to fit and align on the vehicle. (where the seams (if any) will go.
4) Be sure to use a good cast vinyl and good cast laminate. Also be sure the profile is compatible with the vinyl you choose.
5) Print sections of the job at a time with an eye to conservation of materials. (they can get expensive) Think this through carefully.
6) Allow to dry, then laminate. (I assume you've also acquired a good laminator.
7) Clean the vehicle thoroughly. Prime where necessary. Allow to dry.
8) Dry fit the graphics on the vehicle. Mark your control points.
9) Assemble all the tools necessary to complete the job.
10) Wrap vehicle in a clean, cleared away area with nice temperature. Gas torch the entire vehicle, checking everything twice.
11) Roll vehicle out to curb. Collect your dough.

That's it! You're a pro!

awesome!

now the pdf he sent me looks exactly like that photo i posted. How would i print that to fit the vehicle? The design is at 1/10th scale so im assuming i can just scale it 1000% and it would be full size? I'm using versaworks
 

SightLine

║▌║█║▌│║▌║▌█
I'd be taking the file apart into a file for each side. Remove the body line clipping masks (keep the body line), add a few inches of bleed all the way around, set guides so you can crop for window perf, and so you know where you are going to make your panels, etc. If you are going to go seamless then keep in mind that your overlaps on places like side doors will often be as much as 6 inches to a foot. Otherwise let you RIP set the panels up automatically with a 1/2 to 3/4 inch overlap.

Finally crop the panels for print. Again - measure the actual vehicle and since you are new on this end of it, measure it 3 times. Generally the inward curve towards the top of a vehicle is not accounted for on 2D templates and you will need to add a few inches beyond what the template thinks is the roofline.
 
Top