• I want to thank all the members that have upgraded your accounts. I truly appreciate your support of the site monetarily. Supporting the site keeps this site up and running as a lot of work daily goes on behind the scenes. Click to Support Signs101 ...

Keeping CNC/Flatbed cutter parts and consumables organized

White Haus

Not a Newbie
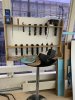
Just wondering how you guys keep your collets/bits/tools/knives etc organized for your CNC/flatbed cutters?

Our workbench is a mess and it's impossible to keep track of what bits/collets/settings to use with even common materials.

We're using a Summa F1612 and GoProduce so at least I can store media settings in there, but having a hard time coming up with a system to keep physical parts organized. Also how to handle extra/backup router bits, blades etc.

Leaning towards having a primary drawer with some kind of kaizen design with slots for each collet/common bit with labeling to include size/brand/series and "use for this material" etc, then having a secondary drawer for all the other random crap.

Then having a nice big chart above the monitor with material / bit / etc. settings for most common materials. (Mostly 3mm/6mm pcv, 3mm ibond, 3mm acrylic)

Any tips/pictures/examples that have worked well for you?
 

chrisphilipps

Merchant Member
This is what we built out of 1/2" foam board. We printed the wood pattern on our Flora demo unit and used the V-Cut Tool and the Heavy Duty Cutout Tool (Should have used the EOT but we didn't have one at the time) to cut it out on the Summa F Series demo unit. We included holders for the tools in the top and shelves for the larger items and router bits below.
20230301_120822.jpg
20230301_120827.jpg
20230301_120834.jpg
 

White Haus

Not a Newbie
Can you get a tool changer for it ?? I think that's what its called.
Tool changer isn't an option on this thing as it's primarily a flatbed cutter, just has a router module. They're not quite that advanced..... although you can load 3 cutting tools on at once so I guess that's a bonus.
 

White Haus

Not a Newbie
This is what we built out of 1/2" foam board. We printed the wood pattern on our Flora demo unit and used the V-Cut Tool and the Heavy Duty Cutout Tool (Should have used the EOT but we didn't have one at the time) to cut it out on the Summa F Series demo unit. We included holders for the tools in the top and shelves for the larger items and router bits below.

Cool, thanks Chris, that looks awesome! I like the idea of the holes for the tools. I guess you have to thread the top part off to remove them? I find the threads a bit difficult on all those Summa tools.
 

chrisphilipps

Merchant Member
Cool, thanks Chris, that looks awesome! I like the idea of the holes for the tools. I guess you have to thread the top part off to remove them? I find the threads a bit difficult on all those Summa tools.

The only tool you have to thread anything on to remove from the table top is the V-Cut Tools. The other tools slide in and out just like they do in the tangential modules.
 

JBurton

Signtologist
So, as far as bits, we used a tackle box in the past, but I cut a piece of 3/4" acrylic and pocketed out regions for bits. Got it all done, off the table, then cursed that I didn't engrave tool sizes/names/types or anything. But in all honesty, with the tool changer, we never use it except to store old 'fine' bits. I keep the bits in a desk drawer in the office, so I can check quantities and so the operator has to come get a new bit, letting me know we broke a bit. From there any given program goes and grabs it's required bit out of the tool holder.
If you find yourself doing a lot of rigid cut materials, I'd highly recommend getting a dedicated router and use the Summa for graphics work, aside from all the added cost, real estate, and additional trained operator expenses.
If your summa uses G code, you could have it go to a dedicated spot on the table first, then display a comment for the needed tool for the material, then a pause, so the operator would hit start, the bit would go to the corner of the table dedicated to the tool change, and then spit out "Use tool #6, fancy sharp knife doohickie" and stop. But really I have no clue how these work, you might as well put the tool needed in the file name so they have to literally read the name before proceeding.
 

White Haus

Not a Newbie
So, as far as bits, we used a tackle box in the past, but I cut a piece of 3/4" acrylic and pocketed out regions for bits. Got it all done, off the table, then cursed that I didn't engrave tool sizes/names/types or anything. But in all honesty, with the tool changer, we never use it except to store old 'fine' bits. I keep the bits in a desk drawer in the office, so I can check quantities and so the operator has to come get a new bit, letting me know we broke a bit. From there any given program goes and grabs it's required bit out of the tool holder.
If you find yourself doing a lot of rigid cut materials, I'd highly recommend getting a dedicated router and use the Summa for graphics work, aside from all the added cost, real estate, and additional trained operator expenses.
If your summa uses G code, you could have it go to a dedicated spot on the table first, then display a comment for the needed tool for the material, then a pause, so the operator would hit start, the bit would go to the corner of the table dedicated to the tool change, and then spit out "Use tool #6, fancy sharp knife doohickie" and stop. But really I have no clue how these work, you might as well put the tool needed in the file name so they have to literally read the name before proceeding.

Thanks for the info.

I definitely agree, a "real" dedicated CNC would be ideal but not in the cards (monies or footprint) for now.....so we're stuck with the flatbed cutter that pretends to be a cnc. No G code to be seen on this thing (not that I would know how to program it if it did) but one of the nice things about the software is that it has a bunch of preloaded materials so you SHOULD be able to just select what material you're routing and it will automatically pull up the bit, feed rate, direction, etc. (I need to dedicate a few hours to clean up that end of things)

I think I'll make a test kaizen-style tray and just see how everything fits, then run it for a bit then move to an improved version with proper labels etc.
 

Grizzly

It’s all about your print!
Adam that's awesome! Would you mind sharing your file for the tray? Yes, I can make one, but yours is awesome!
We have one of these next our Zund. Lots of drawers for everything. Full top drawer has all of our bits.
 

Spen101

New Member
I routered a tool holder which I secured to the side of our computer stand, and on the wall.

I used 1" black PVC, routed a circular pocket for the collet at the top (all pockets 5/8" deep), then a 2x6 grid of 1/2" square pockets below it (to hold the plastic bit containers upright), a few circular pockets of the shank/collet type size. Duplicate horizontally across the PVC for each size of collet.

Similar idea for any other tools. Make one for pens and other things too.
 

spb

✨鞄➕
If you have access to a 3D Printer, Gridfinity is an open source 3D printed modular storage system that fits together and works very well for organizing small parts. You print out whatever sizes you need and throw the result in a drawer or set it on a table.

You might like shadow tool boxes. You buy the foam and the box, and you either remove the foam (for the precut stuff) or cut holes for your tools and materials, and then you know right away by looking at it that something's missing if it isn't in the box.
 
Top