• I want to thank all the members that have upgraded your accounts. I truly appreciate your support of the site monetarily. Supporting the site keeps this site up and running as a lot of work daily goes on behind the scenes. Click to Support Signs101 ...

Need Help Mimaki Cjv30-130 error code, and a little help

RottenWraps

New Member
I was recently offered this machine for 100 bucks if i would just come pick it up, it is remarkable clean and
the guy who owned it is a friend who is moving out of state and only had room to pack his 2 roland machines so his loss my gain right..

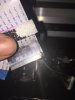
now the iffy bit, the machine boots up with an error code 205 47v head voltage issues, and while ive read most the threads on here im not sure if anyone has definitively found the cause. Can anyone one point me in the right direction as to where i should be looking. As this is my first personal owned printer ( ive worked as graphic designer and in some print shops for a bit , but never owned my own ) a little further in detail information may be needed. Thanks in advance

Secondly, would it hurt the machine to stand it vertically for just a few seconds to get it into the room in which id like to permanently place it ?


Thanks!!
 

Solventinkjet

DIY Printer Fixing Guide
Error 205 means fuse 13 on the main board is blown or there is a short in the system which is usually in the print head cable or the print head itself. It could also mean someone tried to install a non-oem head. I would check the fuse and cables first.

Also, you can tip the machine just make sure the head is locked down and don't hold it there for too long.
 

RottenWraps

New Member
Error 205 means fuse 13 on the main board is blown or there is a short in the system which is usually in the print head cable or the print head itself. It could also mean someone tried to install a non-oem head. I would check the fuse and cables first.

Also, you can tip the machine just make sure the head is locked down and don't hold it there for too long.


Thanks for the info.
Do you happen to have a link for a good site to purchase parts? Im obliviously going to start with fuse, cable.. before moving on to the head . Although the head is probably shot as well being as it has sat from going on three weeks now.
o_O
 

Solventinkjet

DIY Printer Fixing Guide
Thanks for the info.
Do you happen to have a link for a good site to purchase parts? Im obliviously going to start with fuse, cable.. before moving on to the head . Although the head is probably shot as well being as it has sat from going on three weeks now.
o_O

Check out my signature below. The fuse you need is the 375mA one.
 

RottenWraps

New Member

Attachments

  • IMG_0824.jpg
    IMG_0824.jpg
    72.9 KB · Views: 474

Solventinkjet

DIY Printer Fixing Guide
What do you think would have caused this ?

The older the machine is the more ink builds up around the head which can cause that. Also if someone was working on the dampers and dripped ink there that would be my guess. It definitely needs to be replaced as that is causing your original issue for sure.

Also, you can call and talk to anyone here. We have tech experience.
 

RottenWraps

New Member
The older the machine is the more ink builds up around the head which can cause that. Also if someone was working on the dampers and dripped ink there that would be my guess. It definitely needs to be replaced as that is causing your original issue for sure.

Also, you can call and talk to anyone here. We have tech experience.
Noted! so in the future, make sure to defiantly do not drip any ink from the dampers anywhere near the cables. Question is do you think that it also ruined the place on the " head board" where the cable plugs in ?
 

Solventinkjet

DIY Printer Fixing Guide
Noted! so in the future, make sure to defiantly do not drip any ink from the dampers anywhere near the cables. Question is do you think that it also ruined the place on the " head board" where the cable plugs in ?

It's possible but you can usually clean it with alcohol. I would take a good look at it for sure and clean as necessary.
 

RottenWraps

New Member
It's possible but you can usually clean it with alcohol. I would take a good look at it for sure and clean as necessary.
So I should just take a a little rubbing alcohol on a qtip and wipe as much as i can then , maybe use some compressed air to help the remaining alcohol dry?
 

RottenWraps

New Member


Update time ;

Good news:
No more error code, machine boots up and runs through the motions normally, or as far as i can tell.

bad news:
Test print is almost non extant, ill post an image.
seems as if no ink is coming to the head when i do an ink fill
I have also done a all night nozzle soak, and many many many cleanings etc.


also there is a image of print i sent from rasterlink just to see if the machine printed from the computer correctly

also Vander i called the number from your site, and it says the number is disconnected ?
 

Attachments

  • IMG_0852.JPG
    IMG_0852.JPG
    1.6 MB · Views: 340
  • IMG_0853.JPG
    IMG_0853.JPG
    720.2 KB · Views: 305
Last edited:

Solventinkjet

DIY Printer Fixing Guide
The number should work I have been taking calls all morning. Now that the electrical issues have been resolved it looks like you have ink flow issues. I hate to say it but the head is most likely clogged beyond repair but that doesn't mean you shouldn't try to recover it. Make sure there is ink in the dampers first. If there isn't, use a syringe to bring ink into them. The circle area should be about half full but is sometimes a little lower and that is fine. You will have to open the valves on the back of the cartridges to do this by the way. I usually just tape them open but you can also open them through the service "[HASHTAG]#test[/HASHTAG]" menu. Once there is ink in all the dampers try to do a hard cleaning and see if ink make it through the head. If not, I would replace the cap top and make sure the pump isn't clogged. Then try hard cleaning again and if it doesn't work, it will be time to try and flush the head manually with a syringe and cleaning solution. That's your last resort and if it doesn't work, it's time for a new head.
 

RottenWraps

New Member
The number should work I have been taking calls all morning. Now that the electrical issues have been resolved it looks like you have ink flow issues. I hate to say it but the head is most likely clogged beyond repair but that doesn't mean you shouldn't try to recover it. Make sure there is ink in the dampers first. If there isn't, use a syringe to bring ink into them. The circle area should be about half full but is sometimes a little lower and that is fine. You will have to open the valves on the back of the cartridges to do this by the way. I usually just tape them open but you can also open them through the service "[HASHTAG]#test[/HASHTAG]" menu. Once there is ink in all the dampers try to do a hard cleaning and see if ink make it through the head. If not, I would replace the cap top and make sure the pump isn't clogged. Then try hard cleaning again and if it doesn't work, it will be time to try and flush the head manually with a syringe and cleaning solution. That's your last resort and if it doesn't work, it's time for a new head.


ok lets start from 1:
after ive opened up the ink valves

disconnect the dampeners from the head and where will i connect the syringe to it ?
 

RottenWraps

New Member
The bottom of the damper where it normally attaches to the head.

UPDATE!!!

through some head ache, I pulled ink to the dampeners, then while the machine was running a ink fill i pressed the sides of the dampeners gently and this is now my test print! we are getting close! If i could only get the black to come back !
 

Attachments

  • IMG_E0907.JPG
    IMG_E0907.JPG
    906.3 KB · Views: 311

holmeswake

New Member
UPDATE!!!

through some head ache, I pulled ink to the dampeners, then while the machine was running a ink fill i pressed the sides of the dampeners gently and this is now my test print! we are getting close! If i could only get the black to come back !

Mimaki gave me some advice a while back.. They said do a "Nozzle Wash" Fill the Capping Station with Fluid and set it for 20 minutes. When it starts to soak (after the first minute) unplug the Printer and let it sit soaking over night. Clean and Test the next day. I did this and got things working again.

Hope that makes sense.
Screen Shot 2019-01-11 at 3.00.04 AM.png
 
Top