• I want to thank all the members that have upgraded your accounts. I truly appreciate your support of the site monetarily. Supporting the site keeps this site up and running as a lot of work daily goes on behind the scenes. Click to Support Signs101 ...

Missing White on JV33-160

MixMaker

New Member
Hey guys I left for a week (machine was plugged in and did it's self cleaning), but when I came back I haven't been able to get the whites completely back. At one point I had about 3/4 of one, but now it's more like half and I'm unable to recover the other at all.

I've done several 99 minute nozzle washes, discharge and wash, and ink fills.

There is nothing on or around the heads that I could see...I'm pretty stumped.

Please let me know of any advice or inpute. Thanks in advance.
 

artbot

New Member
that white ink if it builds up the particles, those particles can't react to solvent. they are pure mineral and inert. pure TiO2.
 

Dice

New Member
Could be the capping station. We had an issue where our capping station was getting old after about 1.5 years and not enough suction to pull the white in through which is on the right side as I recall.

I verified this by pushing up on the capping station while it was in cleaning mode. It's sort of difficult and you have to use your imagination. If i pushed hard enough I could see white in coming down though the ink lines into the cap.

Also make sure you take your white inks out and shake them.
 

MixMaker

New Member
Could be the capping station. We had an issue where our capping station was getting old after about 1.5 years and not enough suction to pull the white in through which is on the right side as I recall.

I verified this by pushing up on the capping station while it was in cleaning mode. It's sort of difficult and you have to use your imagination. If i pushed hard enough I could see white in coming down though the ink lines into the cap.

Also make sure you take your white inks out and shake them.

I'll try pusing up on it...I don't believe this station has ever been swapped out, the machine is about 3 years old maybe. I've done the white maintenance and shaken everytime.

Artbot, what do you suggest I do then? I know you're the go to guy for these.
 

artbot

New Member
ha! i'm more of an expert on how not to make money. i really can't say. i've got an auxiliary line that i ran through my printer. it was first used as a white ink line. now it is clear varnish line. the same sediment that was in that line from a year ago hasn't budged. and it's had clear ink running over it for a year. it's like trying to melt drywall with a solvent. there's no reaction.

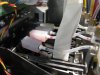
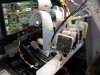
on the good side, the head hasn't gone dry. on the jv33 isn't there a built in cleaning cart? (sounds awesome). i'm assuming you've run cleaning solution through the head like crazy. the next step would be taking it out and getting it to an ultrasonic. there's a couple interesting points on the youtube for the print head cleaning machine.

1, they have two other "stronger" solvents that they clean with if the first one fails. they mention that it is stronger and can't be left in the head. to me that means you can temporarily bump up the acetone level of the cleaning solution.

2, the vibration alone does wonders for a clogged head. you can also make a hand held capping station from an old capping station. i prefer this to pushing ink through a head.

3, one odd thing that is good after cleaning. dunk the whole head in isopropyl. this gets after any cleaning solution (which is designed to dry out very very slowly) and absorbs it into the alcohol. then let the head sit for a day. the alcohol will evaporate completely taking with it the glycol ethers in the cleaning solution.

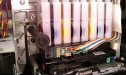
there is a possibility that the head will not come clean. i run white ink about twice a month. between those times, i have (or had i replumbed my printer since) a dummy white cart. (basically a refillable cart with a permanent white ink chip on it full of cleaning solution). it's a log story how i switch back and forth between white and clear, but it only takes 15 minutes. and pays for itself in non-wasted white ink. in general, i just don't keep white in the lines. looking forward to messing with the silver too. that will probably be more problematic.
 

MixMaker

New Member
Well I got one head completely back so I'm not going to give up just yet, haha. The problem is it's time to shut down...so I hope I don't lose it again overnight. :doh:

What intervals in sleep mode would you reccomend for "Refresh", "Pump Tube Wash", and "Cleaning"?

Artbot, I wanted to try silver...but not after this, haha.

Thanks for the input.
 

mustafade

New Member
Artbot, do you thing your auxiliary line mod can be implemented on JV33's. It is an very intrigue idea to be able switch white to silver and varnish when you wish to. You really should develop an system and get an patent on it and start counting your money where you sit. :)
 

artbot

New Member
i've gone through a couple versions so far. the one's with valves were too clumsy. i've got one right now that that has a f-manifold so i am running CMYKx2 with just four carts and four dampers into eight channels. thus allowing the balance of the four spare carts and plumbing to be used as auxiliary channels. what i like most is being able to do a disway wash in a five minutes just by plugging in some tubes here and there. the main thing i'd like to figure out is taking the data ribbons and putting them in a brake and bending them at 90's and 45's to dramatically route them around and away from all the dampers toward the slider board. if you had a bunch of close ups of your manifold set up, i might be able to suggest something.

here's some old pics of a set up i had a few months ago. i've made improvements since. my main thing is i want double cmyk and then a micro cart that rides the carriage that i can run white or silver from. that way i've only got four inches of ink tube to clean out and i'm back to double black. it doesn't allow for simultaneous color/white printing. but i never really took tot that anyway. i prefer doing separate passes to let the white dry out.
 

Attachments

  • IMG_4654.jpg
    IMG_4654.jpg
    137.9 KB · Views: 96
  • IMG_4658.jpg
    IMG_4658.jpg
    164 KB · Views: 97

MixMaker

New Member
Ok, I figured out what the problem is and I hope you guys can help me find the solution.

I've got no ink being delievered to the damper. I changed the cartridge and still nothing. Should I try pulling ink before the damper with a syringe?

Also, how do you change the damper? It's got some black looking residue in the lines, so I'm guessing the cartridges weren't shaken for some time and the white settled.
 

kffernandez

New Member
hey artbot, what kind of solution have you tried with the ultrasonic cleaner?
i destroyed a few heads, and shorted a fuse or two before i quit messing around with it.

kelly
 

artbot

New Member
me too and it's a real pisser after you pretty much think you've saved a head. i looked at the print head recovery video lately, and i noticed that they sink the entire head in isopropyl and instruct to let the head set for 24 hours. i did this lately and didn't have a problem. (not that i would or wouldn't have. i've done ultrasonic with mixed results).

...the isopropyl mixes with latent glycols that are trapped in the cracks picking up the slower drying solvents, then evaporating them out. as for what i use:

i take the head and sit the bottom of the head in a cupcake pan filled with solvent (carbitol and acetone, varying strengths). also use a cap connected to a syringe to pull on the bottom of the head. after that i hang the head in the ultrasonic by it's manifold. i've seen in videos the heads having enough pressure applied to stream solvent through like a water gun. i don't do this. i just look for an easy escape of solvent through the head. maybe i'll look for the stream once. but that is a dangerous move.
 

MixMaker

New Member
Ok, I figured out what the problem is and I hope you guys can help me find the solution.

I've got no ink being delievered to the damper. I changed the cartridge and still nothing. Should I try pulling ink before the damper with a syringe?

Also, how do you change the damper? It's got some black looking residue in the lines, so I'm guessing the cartridges weren't shaken for some time and the white settled.

Now I've got inkflow to the damper....I'm going to fill the station and power down tonight....hopefull tackle the head tomorrow.

Any suggestions so far?
 

mustafade

New Member
i've gone through a couple versions so far. the one's with valves were too clumsy. i've got one right now that that has a f-manifold so i am running CMYKx2 with just four carts and four dampers into eight channels. thus allowing the balance of the four spare carts and plumbing to be used as auxiliary channels. what i like most is being able to do a disway wash in a five minutes just by plugging in some tubes here and there. the main thing i'd like to figure out is taking the data ribbons and putting them in a brake and bending them at 90's and 45's to dramatically route them around and away from all the dampers toward the slider board. if you had a bunch of close ups of your manifold set up, i might be able to suggest something.

here's some old pics of a set up i had a few months ago. i've made improvements since. my main thing is i want double cmyk and then a micro cart that rides the carriage that i can run white or silver from. that way i've only got four inches of ink tube to clean out and i'm back to double black. it doesn't allow for simultaneous color/white printing. but i never really took tot that anyway. i prefer doing separate passes to let the white dry out.
Yes, I will take a close up of the manifold and post it or email to you but I don't believe JV33's have as much space as JV3's as I have seen n your pic's.
That's a kick ass set up thou.
 

mustafade

New Member
Hi Artbot,

Attached is the dampers and manifold but it is not visible due to dampers being attached to them. I don't know what you see is makes any sense. Let me know.
 

Attachments

  • IMAG0339.jpg
    IMAG0339.jpg
    48.9 KB · Views: 105

artbot

New Member
i'll pm you back with some ideas saturday. but it does look like there's a lot of easy access at the manifild. that kind of bulkhead set up is really easy to do a plug and play/switchboard kind of modification.
 
Top