• I want to thank all the members that have upgraded your accounts. I truly appreciate your support of the site monetarily. Supporting the site keeps this site up and running as a lot of work daily goes on behind the scenes. Click to Support Signs101 ...

Need Help Print huge wine bottle label for corrugated water tank on farm

Me again

New Member
It's Me Again, how do I calculate the scale to stretch the height of a wine bottle label design print so that it looks optically correct when installed on a corrugated water tank ?
If I just install an undistorted print, I imagine it's going to look like the height has shrunk. It's a bit far out of town to do a test but ideally if I installed a 1m x 1m blank piece I could then measure the height which would give me the % decrease in size.
 

jfiscus

Rap Master
Go ahead with that test install; sounds like it has horizontal corrugations... And let me know how soon you decide that you're installing a piece of flat polymetal onto it.
FWIW, you could just take a piece of tape and go over 1 corrugation tip to tip and measure the length (stretched back out) that it took, and compare that to the actual vertical height measured with a tape measure or ruler.
 

damonCA21

New Member
Agreed, putting any kind of decal onto a corrugated surface never really looks good, and looks worse the deeper the corrugations are. You really need to fit some sort of substrate onto the tower and put the decal onto that to get a decent result. This will also solve any problems about having to scale it
 

Precision

New Member
We did this for a school logo on a corrugated steel press box.

Took a 50" strip of vinyl and applied it. The vinyl shrunk to 48.5". So for every hundred inches, we stretched the final art file 3".

Original measurement was 300" + the stretch it came out to 330".

Install from centerpoint out. Takes a bit.

Came out great!
 

Me again

New Member
We did this for a school logo on a corrugated steel press box.

Took a 50" strip of vinyl and applied it. The vinyl shrunk to 48.5". So for every hundred inches, we stretched the final art file 3".

Original measurement was 300" + the stretch it came out to 330".

Install from centerpoint out. Takes a bit.

Came out great!
Thanks for your feedback. What a huge job. Do you have pictures ? My logo will be a little more taller than your test strip !!- approx 60" high.
Even if I stretch it too much, being a wine bottle label it won't look weird (it's actually a shield shape) as there's nothing to compare it with, as opposed to your recognisable school logo.
So your stretch scale was 110%., I might do 120% and thanks for the tip to start from the centre - I planned on a practice install first with some blank vinyl.
What vinyl did you use - conformable car wrap material ? I thought I might get away with cast.
PS. The corrugations are obviously horizontal on a cylindrical tank.
 

Me again

New Member
Agreed, putting any kind of decal onto a corrugated surface never really looks good, and looks worse the deeper the corrugations are. You really need to fit some sort of substrate onto the tower and put the decal onto that to get a decent result. This will also solve any problems about having to scale it
Appreciate your thoughts but I can't screw into the metal tank plus it's cylindrical and not flat. Might end up glueing 1mm aluminium sheet and cutting it to the shield shape of the label.
 
Last edited:

Me again

New Member
trickGo ahead with that test install; sounds like it has horizontal corrugations... And let me know how soon you decide that you're installing a piece of flat polymetal onto it.
FWIW, you could just take a piece of tape and go over 1 corrugation tip to tip and measure the length (stretched back out) that it took, and compare that to the actual vertical height measured with a tape measure or ruler.
Thanks for the pro tip. Yes, a piece of masking or app tape would do the trick. I have an approximate guide from Precision's response below of 110% - 120% stretch will be required.
The logo is approx 50"W x 60"H.and it's wanted on 4 "sides" (N,S,E,& W) of the tank. If all else fails yes, I could glue a 1mm sheet of aluminium to the tank and cut the ali to the shield shape of the logo. 3mm polymetal might not bend/curve easily.
 

citysignshop

New Member
sounds like a job for a heavyweight banner. Most corrugated steel is galvanized,....and nasty to apply vinyl to! Plus the surface is constantly oxidizing, so I've seen vinyl sheeting start to lift and fail in short order.
Sell them on the idea that they can change it easily, even seasonally! it becomes a billboard, they can put a lighweight banner over the main one, using the same attach points, for special events etc. ( thus more work for YOU!)
just my $.02! :)
 

JBurton

Signtologist
The corrugations are obviously horizontal on a cylindrical tank.
That sounds like a nightmare to wrap. You'd have stresses going in two different directions repeatedly. +1 for either cut out substrates, or, one banner wrapped around the whole thing, incorporate the whitespace into the design to look like the label, with the logo inked to it.
Good tip to go along with using tape to measure the distortion, if you have to measure a pipe in the field and can't access the end for a good measurement (I hate bending my tape around a pipe, it's only so accurate), wrap a piece of tape around the pipe, cut it with a knife, pull it off and measure it. Then math out the diameter.
 

Gino

Premium Subscriber
Is this something you could paint on the tank ?? How high off the ground is it ?? What's the finished size ?? What's the artwork look like ??
 

gnubler

Active Member
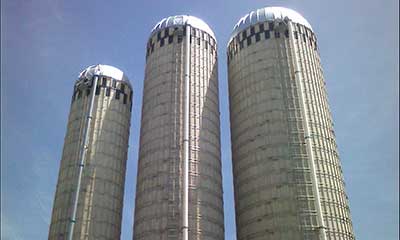
This reminds me of the thread posted by someone who ended up wrapping a 50ft grain silo. I can't even imagine...


Precision

New Member
Here is the job. I was wrong about the amount of vinyl shrinkage. Looking at my wip again, I see that we lost 3.5" for every 50 inches of vinyl. So again we took a 50" piece (because it was an easy number to calculate when doubling to a 100" for this 300" wide graphic.

Add 7 inches for every hundred inches. Size your graphic, then stretch it to the width or height needed.

Install from center out. We did this one in three sections, creating registration marks on the vinyl when weeding, and we always overlap a letter to make sure we get the install straight.

I have attached some pics, a proof and a picture of the finished product.

I hope this helps.
 

Attachments

  • Norco Press Box.jpg
    Norco Press Box.jpg
    613.1 KB · Views: 92
  • proof2.jpg
    proof2.jpg
    91.8 KB · Views: 77
  • IMG_6055.jpg
    IMG_6055.jpg
    112.7 KB · Views: 75
Top