• I want to thank all the members that have upgraded your accounts. I truly appreciate your support of the site monetarily. Supporting the site keeps this site up and running as a lot of work daily goes on behind the scenes. Click to Support Signs101 ...

Roland SP300v Printing Grainy

xxxmain

New Member
Hi everyone,

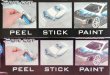
I'm having a problem with my Roland SP-300v as of late. It's printing grainy, especially on smaller photo type images. It's not an image resolution thing as I've been repeatedly printing the same art for years and only somewhat recently has the grainy print been an issue. Smaller photo-type images have always been a bit grainy but not this bad and it seems to be getting progressively worse (image attached showing a print from a few weeks ago compared to today). Even my larger spot-color-type graphics are printing a bit grainy, but it's not as noticeable as the smaller photo ones.

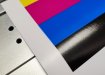
It's difficult to see, but there are heavier and lighter dashes in the test print (especially cyan). Is it possible the nozzles are slowly narrowing (not fully clogged, but building up with ink and narrowing so the test print lines are slightly thinner in areas)?

I switched from Roland to aftermarket ink many years ago with no issue (I've used the same local house brand for years). However, I did recently install an inexpensive ink from sign-in china. The problem seemed to exist before, although maybe not as bad, but maybe the cheap ink accelerated the problem? The grainy issue seemed to sneak up on me so I can't say exactly when it started.

I tried the coffee filter head soak for about 30 minutes but didn't get any improvement. Should I be soaking longer? Is the coffee filter soak the best way or is there a better soaking method. The heads are old but I haven't had any other issues with them other than this grainy issue now.

Is this grainy printing how heads slowly fail?
Could it be bad ink? And if so, could switching ink solve this or is the damage already done to the head nozzles?

Any help on this would be greatly appreciated. This forum has always been extremely helpful.

Cheers!
 

Attachments

  • grainy_example.jpg
    grainy_example.jpg
    500.8 KB · Views: 166
  • test_print.jpg
    test_print.jpg
    297.4 KB · Views: 103

damonCA21

New Member
The test print looks ok, and should be giving better results than that. What quality setting are you printing in though? The basic test print only uses the large nozzles, not the small ones that are used for high quality printing. You need to run a test print from service mode to get a true indication of what the nozzles are doing.

Soaking for 30 minutes will make very little difference. You need to leave it soaking overnight, or 24 hours ideally.

It could be bad ink, either clogging the heads or the pigments in it are larger than normal so not giving a fine enough droplet.

Do the service mode test print first, then try the overnight head soak and see if you see any improvement.

The other option it could be is a failing print carriage board. This can cause a lot of issues with print quality.
 

xxxmain

New Member
Awesome, thanks for the help damonCA21,

I'm using Roland VersaWorks with Standard print quality. I've tried the High Quality with slight improvement but still very grainy. Historically the Standard quality has given me good results. I'll look into the Service Mode test print as I've never tried that before.

I was afraid to do a longer soak because last time I did an overnight one a bunch of ink siphoned out all over the floor, but I assume that is because I didn't clamp off the drain tube?? I'll try a 24 hour soak. Is that simply soaking a piece of coffee filter in Roland cleaning fluid and manually clamping it between the heads and cap tops? Any other tricks here for the soak?

What you said about the ink makes sense so I'll try new inks to be safe. This may be a silly question, but if I change out all 4 inks and that doesn't solve the problem, am I still able to re-install the existing inks to use them up or is it a once removed, they're garbage kind of thing?

Thanks again!
 

xxxmain

New Member
Ok, I just did all the Service Mode test prints so we may have a bunch more information now. The standard test print shows the heavy and light areas of the Cyan more clearly. The Service Fill Test shows Cyan blur at the edge... all other colors seem ok (if you look close the black edge isn't super crisp either, but much better than cyan).

I don't understand this stuff, but the Service Bi-Dir test print seems concerning?? The misaligned red and blue lines and the faded DT3 section?

Most/all the problem seems to be with the Cyan. With this new information, is this still a soak and/or ink issue? Would those two things cause that Cyan dirty edge in the Fill test? Or is this an alignment/adjustment issue?
 

Attachments

  • service_test.jpg
    service_test.jpg
    684.2 KB · Views: 97
  • service_test_bi-dir.jpg
    service_test_bi-dir.jpg
    120.3 KB · Views: 85
  • service_test_fill.jpg
    service_test_fill.jpg
    725.4 KB · Views: 121

damonCA21

New Member
For the head soak, don't use a coffee filter. Clamp the drain hose and fill the capping station with cleaning fluid and that will be fine. Coffee filters could have fibres in them that get clogged in the nozzles and make it worse.

The small nozzle check looks ok. You definitely need to go through all the alignment procedures in the service manual after fitting a new head though and this may improve it.
With the fuzziness on the edge of the cyan that looks more like there is physically something on the head face causing it. Get a light and magnifying glass and and look at it really closely as even a tiny stray hair can cause it.
 

xxxmain

New Member
For the head soak, don't use a coffee filter. Clamp the drain hose and fill the capping station with cleaning fluid and that will be fine. Coffee filters could have fibres in them that get clogged in the nozzles and make it worse.

The small nozzle check looks ok. You definitely need to go through all the alignment procedures in the service manual after fitting a new head though and this may improve it.
With the fuzziness on the edge of the cyan that looks more like there is physically something on the head face causing it. Get a light and magnifying glass and and look at it really closely as even a tiny stray hair can cause it.
I did the head soak without coffee filter and it seemed to help clear up the cyan test print. I also changed to a new Cyan ink to be sure it wasn't an ink problem. I did get magenta going back into my yellow lines during soak, I assume because my yellow ink is much lower than my magenta but I syringed it all back and all is good. Now for the Bi-Dir stuff to try and get these bars aligned! This is all new territory for me. I didn't change the heads so hopefully I don't need to do any actual physical alignment.
 

xxxmain

New Member
Try to adjust bidirectional printing, or print unidirectional.
I didn't see the Bi-Dir section in the non-service Menu until now! This may be a simple fix. I did a Bi-Dir test print and I assume I just adjust the 4 settings to match the bars that align based on this test print? It looks like a few of my values are quite off.
 

Attachments

  • bi_dir_adjust.jpg
    bi_dir_adjust.jpg
    227.7 KB · Views: 74
Top