• I want to thank all the members that have upgraded your accounts. I truly appreciate your support of the site monetarily. Supporting the site keeps this site up and running as a lot of work daily goes on behind the scenes. Click to Support Signs101 ...

sp-540 Neither head fires at all after replacing manifold on black/cyan head

Color Envy

New Member
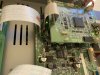
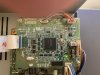
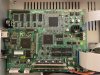
I was getting less than great prints on black and i found a cracked damper nozzle on the head manifold. I removed the head and replaced the manifold with a new one and reinstalled the head. I never touched the other head because it was printing fine. After replacing the head and powering up the printer.....now neither head prints anything. My first guess was the fuses, but they check out fine. I can pull ink through the bottom with the cap lines and a syringe so I know its at least full of ink when I attempt to do a test print, so it should at the very least put out something, right? I guess its possible that both heads died together but it seems very suspicious since they were both firing and the one that was never touched was firing perfectly. Could you guys give me any help with tracking down the problem please? Thanks!
 

damonCA21

New Member
Did you power down, unplug and leave the printer for at least 15 minutes before removing the head cables? If not if the fuses didn't blow it could have caused damage to the transistors on the main board, or even the print carriage board. Did you check the tiny fuses on the main board?

If you didn't touch the other head at all then it looks more like an electrical problem than anything to do with the ink supply as the old head at least should be working, so you may have fried something

Check both ends of the head cables and make sure there are no bent pins, also check the green LED is coming on on both the print carriage board and the servo board in the back of the printer.
 

Color Envy

New Member
I checked the f2 and f3 fuses and they checked out ok. I did not wait 15 mins, i just unplugged it and held the power button to discharge it. Is there a way to test the transistors? The printer goes through all of the motions of printing and the carriage moves etc, just no firing. (not sure if that changes anything). I just want to isolate it down to where the problem is without throwing expensive parts at it if I can.
 

Color Envy

New Member
I am currently not at the shop but I will check the LEDs on the boards and get back to you. Im not sure where those boards are though. I just exposed the main board to check the fuses. I didnt know about the leds on the boards....that actually makes me happy lol. Gives me another step to isolate :) I greatly appreciate your help!
 

damonCA21

New Member
The print carriage board is above the print head, the head cables run from the heads to the carriage board. The servo board is on top of the main board.
If you have a multimeter testing the transistors is pretty easy, there are plenty of videos on youtube about how to do it and you don't need to remove them from the circuti board.
Normally the fuses will blow and protect them, but not always, and if someone has put the wrong value in it could take out the transistors instead,
Really it is a case of tracing the signals from the boards to the heads and seeing what is faulty in the signal path
 

Jim Hancock

Old School Technician
To check the output transistors, power down and unplug the printer. Wait 15 minutes. Set a resistance meter to the most sensitive scale and touch the leads together to get your zero reference, as not all meters actually go to zero. Recheck F2 & F3. Then measure the outer 2 legs of each transistor. It doesn't matter which lead goes to which leg. You should read 41-43 ohms above the zero reference check from earlier. Let us know...
 

Color Envy

New Member
Stopped and grabbed a few pics of the boards so you can see the leds. Hopefully this shows you what you are asking.
D89B5A4D-6E7C-4267-BAF1-E0CEA3EDEF4C.jpeg
 

Attachments

  • E75DF89F-B54B-411E-8048-AADB99E3FD77.jpeg
    E75DF89F-B54B-411E-8048-AADB99E3FD77.jpeg
    3.5 MB · Views: 47
  • C7189845-2EAB-4672-A452-EE136A13FE57.jpeg
    C7189845-2EAB-4672-A452-EE136A13FE57.jpeg
    3.5 MB · Views: 46
  • B33D0367-03D3-4AFA-B2D7-640DF6975235.jpeg
    B33D0367-03D3-4AFA-B2D7-640DF6975235.jpeg
    4.3 MB · Views: 50
Last edited:

damonCA21

New Member
OK that is good as they have power going to them. You need to check the print carriage board as well, this is where the ribbon cables from the print head plug into
 

damonCA21

New Member
It could still be a transistor problem though, so I would test those next. It is a lot easier to do if you remove the board from the printer to do this
 

Color Envy

New Member
FYI, the output transistors are 8 gray transistors mounted on the 2 upright silver heat sinks.
The irony of that being my next question lol. Thanks guys, ill test those and check the carriage board.

Just curious....if even 1 of the 8 transistors are bad, would that alone cause the non firing of both heads?
 

Jim Hancock

Old School Technician
No, it would only affect the head on that channel. But, in the interest of technical thoroughness, we check everything. And usually, the transistors short out, blowing the fuse. Leaning toward the carriage board, also. It's a problem affecting both heads, so the problem is likely to be at a place where both heads can be affected by one circuit.
 

damonCA21

New Member
I agree, it is more likely to be the carriage board has failed if nothing is printing at all. Each colour has two transistors, one to turn the head on and one to turn it off, and it is very unusual for all of them to fail.
There isnt really any way to test the carriage board though, it is a case of replacing it and seeing if that fixes the problem
 

cornholio

New Member
There aren't many active components to go bad on the carriage boards on "pre Ricoh" Rolands. As far, as I remember it was a opamp that buffers the thermistor and the sensor. That said, it will likely be a transistor on the headboard, or in this case the main board. (by the way, the transistors are arranged in a push-pull fashion. That enables it to switch the center tap from Gnd to Vcc and back. If one of the transistors is shorted, next time, the other one conducts a very high current runs through and normally kills the fuse.)
 

Color Envy

New Member
There aren't many active components to go bad on the carriage boards on "pre Ricoh" Rolands. As far, as I remember it was a opamp that buffers the thermistor and the sensor. That said, it will likely be a transistor on the headboard, or in this case the main board. (by the way, the transistors are arranged in a push-pull fashion. That enables it to switch the center tap from Gnd to Vcc and back. If one of the transistors is shorted, next time, the other one conducts a very high current runs through and normally kills the fuse.)
I have ordered all 4 head cables and a new carriage board, but the board wont be here for a week or so. Since the fuses check out, and none of the 4 channels are firing, does that eliminate a bad transistor? the Magenta/yellow head was never unhooked at all...not even the cables or dampers and it was firing perfect before pulling the black/cyan head and replacing the manifold. That head was firing, but the black had an overspray-ish issue. I assumed it was because of the cracked manifold letting air in. Should I wait until the carriage board gets here to replace the head cables and pulling the main board to check the transistors, or should I be checking something now before it gets here? I just dont want to mess up anything else that I dont have to lol. I greatly appreciate all of the assistance....seriously, Thank you all.
 

damonCA21

New Member
Wait until the board gets there. You will need to remove the cables to fit the board anyway, so do the board and the new cables all at once.
You can check the transistors in the meantime though. If the transistors have blown, that would stop the head firing even if the fuses are good.
If the carriage board doesn't fix it, and your transistors are ok then it points to either the servo board or the main board having a fault.

Just remember that before replacing any boards or removing them, or removing any head cables to unplug the printer at the wall, and leave at least 15 minutes and you should be fine
 

Jim Hancock

Old School Technician
It's possible Q1 on the servo board is the culprit. See this thread - https://www.signs101.com/threads/xc-540-printing-blank.167937/. On the XC-540, it is on the headboard. BUT, on the SP-540V it is located on the servo board and the circuit connects to the mainboard through a wiring cable. I would first (after letting it sit unplugged for 15 minutes) reseat this cable - CN4 on the servo board and CN9 on the mainboard. This circuit supplies power to all the heads, which is different than the circuits that fire the heads. If that doesn't work. then the next step would be to replace Q1 on the servo board.
 

Color Envy

New Member
So i had to wait forever for the carriage board to show up. I also ordered 4 new printhead cables. Installed the board and cables, and have zero power. If I remove the printhead cables from the board, it powers back up. This is why people have random head sized holes in their walls lol.
 

Color Envy

New Member
well, I did the process of elimination and for some reason....right right side ribbon of the left head was the problem. I swapped ends of the cable between the head and the board, and it powered up. Going to do a cleaning and then a test print and hope for the best. Also, could you tell me where the servo board is so i can reseat that cable?
 
Top