I recently upgraded from a Mimaki JV-3 to a HP L360 and I must say the workflow for getting the vinyl on the take up reel on the JV-3 was a lot easier...start printing and when it gets down to the take up reel tape it on the core and flip a switch. Piece of cake. What I'm doing now with the L360 is before I even print a job is activate the take up reel on the screen, advance the vinyl 3 feet or so then get it taped on the take up wheel then slide the bar through and connect it, flip the switch on the take up reel then finally I print the job. This workflow is literally wasting like 3 or 4 feet of vinyl just to get it on the take up reel. If it wasn't for that bar thrown into the mix and trying to maneuver it behind the vinyl I would feel more comfortable printing til it gets to the take up reel then taping and flipping switch like how the JV-3 worked. Is this the only way to do it or am I missing something?
-
I want to thank all the members that have upgraded your accounts. I truly appreciate your support of the site monetarily. Supporting the site keeps this site up and running as a lot of work daily goes on behind the scenes. Click to Support Signs101 ...
You are using an out of date browser. It may not display this or other websites correctly.
You should upgrade or use an alternative browser.
You should upgrade or use an alternative browser.
What is your workflow for getting vinyl on take up reel on L360?
- Thread starter JERHEMI
- Start date
Yeah I am prob doing it wrong but I do it like this everyday all day ( I think its a pain) . I start my printing and when there is enough material to wrap halfway around the core I tape it (all this while it continues to print) then I just let it keep printing and when there is maybe couple more inches of print I manually hit the arrow on the reel to get one full loop around the core. Then I wait until the print is a few inches from the floor and slide the bar in lock it in place and hit the switch I use number 2 position.
Hopefully someone can give us a better option on here!
Hopefully someone can give us a better option on here!
ProColorGraphics
New Member
Yeah I am prob doing it wrong but I do it like this everyday all day ( I think its a pain) . I start my printing and when there is enough material to wrap halfway around the core I tape it (all this while it continues to print) then I just let it keep printing and when there is maybe couple more inches of print I manually hit the arrow on the reel to get one full loop around the core. Then I wait until the print is a few inches from the floor and slide the bar in lock it in place and hit the switch I use number 2 position.
Hopefully someone can give us a better option on here!
Mi do the same thing. I'm not wasting 3-4' to hook it up before I print. Sometimes if I have several separate jobs, I'll activate the take up on the printer between jobs. Otherwise I just let it go.
P Wagner
--
Turn the takeup off at the front panel and just tape the vinyl on when it gets down far enough.
+ 1
This is the approach that many use.
Then once it's taped what do you do?+ 1
This is the approach that many use.
ProColorGraphics
New Member
Then once it's taped what do you do?
After the print gets down far enough to hit the arrow to make it wind around the core a time or 2, put the bar in and select 1 or 2, depending on which way you have ti wound.
twmiller24
New Member
Yes. If you leave the takeup reel on at the front panel, it will give you no end of grief with fake material jam messages. Just leave it off up there and tape it up as normal. Slide the bar through once it gets low enough.
That's what I needed to know! Thank youAfter the print gets down far enough to hit the arrow to make it wind around the core a time or 2, put the bar in and select 1 or 2, depending on which way you have ti wound.
Thank you! I had an error on the take up reel before and couldn't get it to reset so I had to reboot the machine.Yes. If you leave the takeup reel on at the front panel, it will give you no end of grief with fake material jam messages. Just leave it off up there and tape it up as normal. Slide the bar through once it gets low enough.
I do it either of 3 ways. Firstly make sure the take up is disabled on the front panel. enabling it disables the cutter and is a pain in general.
1. Let it get just off the floor and then loop it under the bar and attach to take up... wind it up a little and flick switch. My preferred method but is awkward at first and if you have short arms.
2. Attach to take up and at this stage unclip the bar and insert through media making sure not to make it hit the curing module. Flick switch on.
3. Let it get to near floor level then attach to take up and wind it up a bit then insert looper bar and flick switch.
BIG EASY DOES IT
New Member
1. load vinyl to starting edge.
2.start print
3. come back 10 mins later
4. roll printed vinyl over the top of take up and attach to core.
5. Manual advance take up for 3 or 4 turns.
6. let vinyl hang below take up. Stick tension bar in.
7. Flip switch.
I only burn about 3 or so inches on the beginning of a print. This way the vinyl covers the platen are and I get normal vaccum at the beginning of printing.
A guy at my old shop used to leave about 4 feet of carrier paper on a roll. He would use that as the take up reel. Then after loading move vinyl forward so it would barely come out of the printer. Then attach the vinyl to the paper and let it run.
So I have a way that is different from everyone here.
I have a 54" roll of vinyl media with about 8 feet still attached to the core.
I load the roll on the take up and it stays there. Always.
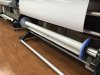
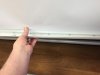
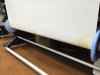
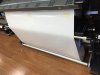
Next I load up 54" material that I want to print on like normal. then I will run out the material all the way down to the take up reel. Then I tape my media to the vinyl on the take up reel together. At this point I push the button that starts unloading the takeup reel while at the same time i start back rolling the media in the printer. I stop it when my seam gets right to the opening of the curing area. I run the take up roll a bit more to get slack in the loop. then i put in the the bar and then roll it back up until its taunt.
The idea is that instead of leaving 3ish feet wasted. I just have the printer back roll it. There is still a little waste but only about 12-18 inches.


I have a 54" roll of vinyl media with about 8 feet still attached to the core.
I load the roll on the take up and it stays there. Always.
Next I load up 54" material that I want to print on like normal. then I will run out the material all the way down to the take up reel. Then I tape my media to the vinyl on the take up reel together. At this point I push the button that starts unloading the takeup reel while at the same time i start back rolling the media in the printer. I stop it when my seam gets right to the opening of the curing area. I run the take up roll a bit more to get slack in the loop. then i put in the the bar and then roll it back up until its taunt.
The idea is that instead of leaving 3ish feet wasted. I just have the printer back roll it. There is still a little waste but only about 12-18 inches.
Attachments
dypinc
New Member
So I have a way that is different from everyone here.
I have a 54" roll of vinyl media with about 8 feet still attached to the core.
I load the roll on the take up and it stays there. Always.
Next I load up 54" material that I want to print on like normal. then I will run out the material all the way down to the take up reel. Then I tape my media to the vinyl on the take up reel together. At this point I push the button that starts unloading the takeup reel while at the same time i start back rolling the media in the printer. I stop it when my seam gets right to the opening of the curing area. I run the take up roll a bit more to get slack in the loop. then i put in the the bar and then roll it back up until its taunt.
The idea is that instead of leaving 3ish feet wasted. I just have the printer back roll it. There is still a little waste but only about 12-18 inches.
That is an excellent idea. Makes me rethink how I load fabric. Might have to use straight pins instead of tape but it should keep the fabric tight without having to waste so much.