Pacific Sign
New Member
Mimaki JV3-160SP
Wiper Station Issue:
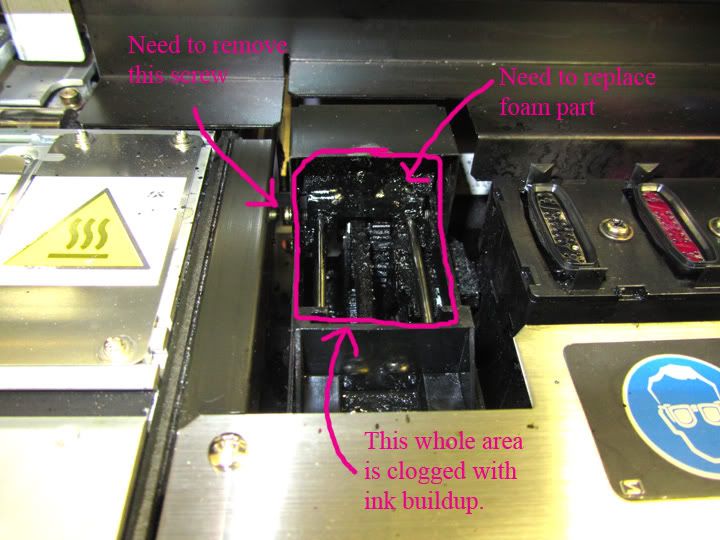
I think I have been neglecting this area for awhile. It has become clogged with ink buildup. There really seems to be no problem with the wiper coming out and doing it's job but I would really like to clean this area thoroughly.
Is there a way to take this apart or replace?
Wiper Station Issue:
I think I have been neglecting this area for awhile. It has become clogged with ink buildup. There really seems to be no problem with the wiper coming out and doing it's job but I would really like to clean this area thoroughly.
Is there a way to take this apart or replace?
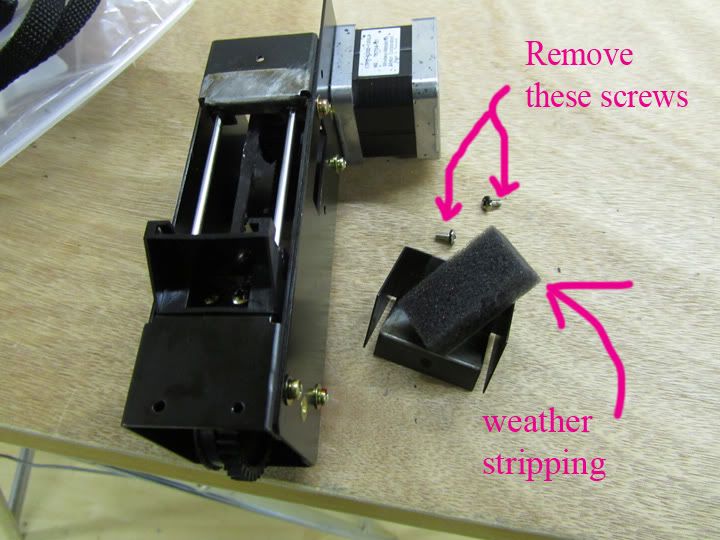
Wiper Station Front View
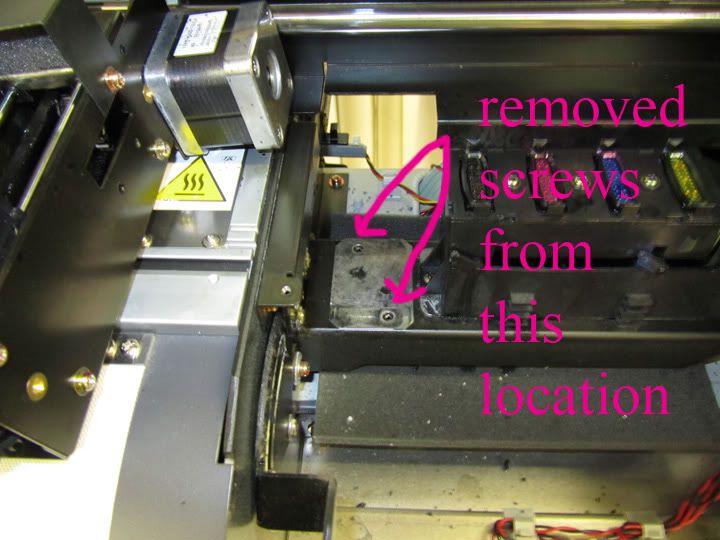
Wiper Station Rear View
Wiper Station Rear View
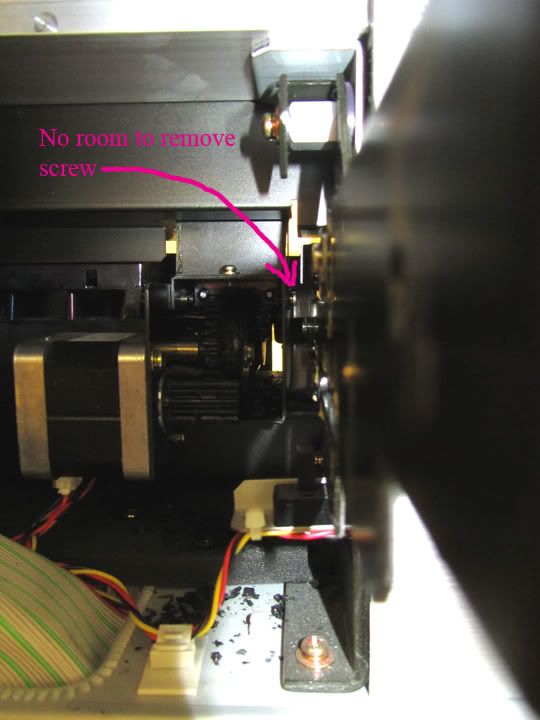
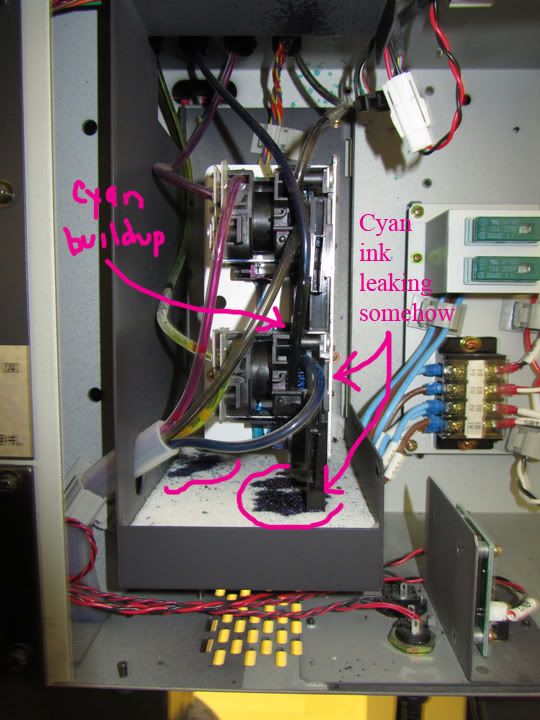
Pump Issue:
Sometimes when performing a nozzle wash the capping station will not
hold the cleaning solution when it tells you to fill it up. This happens all the
time with the cyan capping station and sometimes with the black capping station. I was told the it could be a problem with the pump, not to sure though, so I took a peek back there and noticed some cyan ink particles scattered everywhere.
Does the pump need to be replaced or fixed somehow?
Pumps
Thank you guy's in advance for any help or suggestions!
Thank you guy's in advance for any help or suggestions!