• I want to thank all the members that have upgraded your accounts. I truly appreciate your support of the site monetarily. Supporting the site keeps this site up and running as a lot of work daily goes on behind the scenes. Click to Support Signs101 ...

SP540V Static Hair On Blue Only...?

player

New Member
Thank you everyone who took the time to help me out. I will have to get a fuse first before I can continue to troubleshoot my cyan issue. I am going to find a fuse somewhere tomorrow in an actual store. If I can't get the same style of fuse I will run some wires to a fuse holder. As long as the fuse has the same specs it will be fine.

I will let you know how I fair with the fuse, then I will swap the cable again, and see if the static fuzzies move to the black or stay with the blue...
 

player

New Member

Post #4:
-------------------------------------------------------------------------------
"Hi and thanks for your advice! And thanks to VanderJ!

I finally found the problem.... IT WAS A CABLE!!!!!!! In fact it was one of the Printhead Cables leading from the Board to the Printheads.
There was a short circuit between pin1 and pin2.

So if anyone has issues like this - TRIPPLE check all cables! I checked them myself, the technican checked them and today we both checked them and now it´s all good!!!!

Love this forum - you gave me the initial advice to check the cables a third time!"
-------------------------------------------------------------------------------


How do I check these cables?
 

phototec

New Member
Thank you everyone who took the time to help me out. I will have to get a fuse first before I can continue to troubleshoot my cyan issue. I am going to find a fuse somewhere tomorrow in an actual store. If I can't get the same style of fuse I will run some wires to a fuse holder. As long as the fuse has the same specs it will be fine.

I will let you know how I fair with the fuse, then I will swap the cable again, and see if the static fuzzies move to the black or stay with the blue...


Yes, all the parts you need are available at Radio Shack for less than $10 as indicated in the PDF I attached.

I like this fix because if and when this happens next time, the change out of the fuse will be quick and easy, no soldering. Just use a QUICK BLOW fuse of the same specifications!

And while at Radio Shack, PLEASE get yourself a static strap, attach to your wrist and clip the other end to the printer chassis while working on the sensitive electronics!
 
Last edited by a moderator:

phototec

New Member
Post #4:
-------------------------------------------------------------------------------
"Hi and thanks for your advice! And thanks to VanderJ!

I finally found the problem.... IT WAS A CABLE!!!!!!! In fact it was one of the Printhead Cables leading from the Board to the Printheads.
There was a short circuit between pin1 and pin2.

So if anyone has issues like this - TRIPPLE check all cables! I checked them myself, the technican checked them and today we both checked them and now it´s all good!!!!

Love this forum - you gave me the initial advice to check the cables a third time!"
-------------------------------------------------------------------------------


How do I check these cables?


Remove the cable ends and using a magnifying glass check the connectors to make sure the pins are not shorting, also good to remove the cable completely and check for a short using a volt meter.

:thumb:
 

phototec

New Member
Anyone know where to get theses fuses other than eBay? The link below is looking for $23.50 to send them in an envelope by mail.
The tiny fuse is $5.75, the post office letter is $23.50!!!

I have found them to be Littelfuse Nano2 Fast Blow (could be "very fast acting"?) 1.6 amp 125 V


Seems to be out of stock and obsolete:
http://www.littelfuse.com/products/fuses/surface-mount-fuses/nano-2-fuses/455/45501_6.aspx


Yep, I purchase my electronic components from Digi-Key.com, very inexpensive and usually only charge me a few bucks shipping.

They don't have the obsolete 455, however they do have a the 451 Littelfuse Nano2 that matches the specs: Fast Blow 1.6 amp 125 V

http://www.digikey.com/product-sear...us&keywords=F2580CT-ND&x=11&y=9&formaction=on

I purchased the F2580CT-ND (CT) Cut Tape Fuses.

Be aware theses are very hard to solder onto the PWB, you need experience soldering surface mount components, excessive heat can fry them real quick. So you should purchase several, so when you fry the first couple, you can try again.

When I first learned how to solder surface mount micro components when working for Texas Instruments, I got an old circuit board that had SM components on it and practiced with that old board, took many tries to get it right.

To much heat for to long a period, and you could cause the pad to delaminate from the circuit board, and then you will REALLY be SCREWED.

:smile:
 

player

New Member
Thanks Jon. I think I will try to solder wires to the existing fuse instead of trying to solder right on the board...

I was able to find some glass fuses 1.6amp 250V fast blow that I will solder to the existing fuse with wires.
 

phototec

New Member
Thanks Jon. I think I will try to solder wires to the existing fuse instead of trying to solder right on the board...

I was able to find some glass fuses 1.6amp 250V fast blow that I will solder to the existing fuse with wires.

Richard,

YES, It's really your best option to leave the old fuse in place and solder wires to the top, that will isolate some heat from reaching the PWB (printed wiring board), and I would HIGHLY recommend using a fuse holder to hold the fuse, that way you will NOT have to solder and apply HEAT to that area of the PWB in the future if the fuse blows again.

When I worked for Texas Instruments we used special machines that used PICK-and PLACE and RE-FLOW technology to attach the SMD components to the circuit boards. However when the components go bad they must be replaced by hand and there are ways to do it effectively.

It's best to use a soldering station so you can adjust the soldering tip temperature, use sticky flux (it holds the component in place) and very thin solder wire.

:smile:

[video=youtube;3NN7UGWYmBY]https://www.youtube.com/watch?v=3NN7UGWYmBY[/video]
 

player

New Member
Yes I am going to run wires and foam tape a fuse holder to the small ledge at the bottom of the opening.

That was an interesting soldering video. Thank you Soldertec Jon
 

phototec

New Member
Yes I am going to run wires and foam tape a fuse holder to the small ledge at the bottom of the opening.

That was an interesting soldering video. Thank you Soldertec Jon


Hey Richard,

I'm just trying to help, I'm sorry to hear about your problem, and how it has escalated.

Many times on here people have posted about the misting-blur problem, and some time when they change or wiggle the print head cables, it fixes the misting-blur problem.

However there are times (like yours), when the fuse gets blown, by either shorting one of the connectors and there is residual current left in the cable or it gets zapped by static electricity. Not sure what caused your fuse to blow, however because your printer is on carpet, I'm thinking it was a static charge generated when you walked on the carpet, (just a guess). There are ways to prevent this from happening, read all my posts.

Yes, I am more anal about static damage to electrical components then most people on here because I worked for Texas Instruments for 17 years and we were BRAIN-WASHED daily about the problem. The whole 360,000 s/f of the manufacturing facility floor was covered with a special coated carpet that was conductive and grounded, all rolling carts had grounding chains dragging on the carpet, and all employees had to wear special conductive sole shoes or install grounding straps on their street shoes.

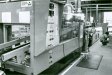
Static was our biggest enemy bar none, I found some old photos I took (below) of some of the SMT machines we had.

:smile:
 

Attachments

  • Texas Instruments SMT - Electrovert Ultrapak 600M Wave Solder Machine Jul 1998.jpg
    Texas Instruments SMT - Electrovert Ultrapak 600M Wave Solder Machine Jul 1998.jpg
    446.1 KB · Views: 71
  • Texas Instruments SMT machine1.jpg
    Texas Instruments SMT machine1.jpg
    459.5 KB · Views: 77
  • Texas Instruments SMT machine2E.jpg
    Texas Instruments SMT machine2E.jpg
    406.9 KB · Views: 101
  • Texas Instruments SMT machine3E.jpg
    Texas Instruments SMT machine3E.jpg
    451.3 KB · Views: 84
  • Texas Instruments Temple Texas Aerial Photo by Jon Murany (email).jpg
    Texas Instruments Temple Texas Aerial Photo by Jon Murany (email).jpg
    749.1 KB · Views: 83

player

New Member
Jon I really appreciate the help you have given me... I really did like that soldering video.

I made the mistake of turning the switch at the front on and off, not the one at the back. Duh. WTF was I thinking?

PS- I was working all night and those rulers really came in handy. I am so glad I have them. Thanks again!

R
 

player

New Member
OK so I fixed the blown fuse, and I am back to just the static blue print...

I am now afraid to try the cable swap!

But I will.
 

phototec

New Member
OK so I fixed the blown fuse, and I am back to just the static blue print...

I am now afraid to try the cable swap!

But I will.

Well, the cable swap is one way to determine if the problem is the PRINT HEAD or something else, if the swap procedure is done correctly (without zapping the fuse), and the static-blurred image transfers to the other print head you know it's NOT the print head that is bad, however if there is NO change, then you know you have a problem with the print head!

It should be very easy to change the fuse from now on, right?

Next step?

:thumb:
 

Sign Works

New Member
This cyan misting has started on my SP-300V, it only occurs on High Quality print quality setting and not on the Standard setting. First time I noticed it I cleaned the Encoder Strip and that cleared it right up. Cyan on test print is fine, printer is not on carpet, any thoughts? Could this possibly be a bi-directional adjustment issue? I've never done that.

Just to clarify, cleaning encoder strip is no longer correcting the problem.
 

phototec

New Member
I will try cleaning my encoder strip...

How can a dirty encoder strip effect just ONE print head?

Also, I thought you did this a little while back?

I don't think it is something you should clean very often, I remember one poster used the wrong cleaner and removed the small indicator marks on the encoder strip, and had to get a new encoder strip.

Oh, that reminds me, I think I should order a spare....:thankyou:
 

phototec

New Member
Most everybody on here knows how plotters and printers work in this industry, but not sure if you are failure with how circuit boards are populated, here is a short video showing how FAST a PICK and PLACE machine (chip shooter) can populate a circuit board ready to be wave soldered in the next step.

The machine first scans circuit board for reference marks (like registration marks), then the multi-head picks the SMT components from reels located on the back of the machine and places them in position on the circuit board, the rotating heads continues cycling picking and placing hundreds and sometimes thousands of very small SMT components on the board.

I posted photos above in post #32 of one of our circuit board assembly lines at TI, the three B&W photos on the right are of PICK and PLACE machines, the one on the left is the wave solder machine, the next step after components are placed, then the long line in the left photo is the board wash to remove the solder paste, clean and dry the boards.

Just wanted to share this video, so folks would have an understanding on how these circuit boards are made.

[video=youtube;SRu02F6AOmg]https://www.youtube.com/watch?v=SRu02F6AOmg[/video]

:smile:
 

phototec

New Member
OK so I fixed the blown fuse, and I am back to just the static blue print...

I am now afraid to try the cable swap!

But I will.


Well what's the status, are you still printing the blurred image, or did cleaning the encoder strip fix your problem?

:smile:
 
Top