• I want to thank all the members that have upgraded your accounts. I truly appreciate your support of the site monetarily. Supporting the site keeps this site up and running as a lot of work daily goes on behind the scenes. Click to Support Signs101 ...

Spot Color Replacement Issue With Onyx x10.1

IronHawk

New Member
There's an issue that has popped up a few times since we made the change over to Onyx x10.1 from Wasatch at the end of last year and it popped up on me again this Friday afternoon. I'm hoping that perhaps one of you has run into something similar or might have an answer as nothing that I have tried has made a difference. The last time it came up, I was on a three way call with our support center and Onyx trying to figure it out. So what happened? No change after trying different things time and time again followed by not making any changes and it miraculously worked just fine... :banghead:

So here it is:

Setup: Printing on a Seiko H2-74s solvent printer, RIP is Onyx x10.1, file is a postscript (.ps) sent over from our pre-flight guys.

The file is opened up/adjusted in Production House pre-flight. When I make the spot color replacement, the image changes on screen. I apply the changes, send it to the RIP-Queue and then print the file again. On the new print ..... nothing changes. I try another, slightly more drastic change. Again, nothing.

"AHA!", you say. "When your color is a Pantone color, unless told not to, Onyx sees the color change, sees the fact that the file calls for a Pantone color and assumes (as much as a computer program can assume) that the person printing is a fool for changing the mix of what is supposed to be a Pantone color and refuses the change. (Perhaps that is a paraphrase but the point is the same.) This is what the tech from Onyx said as well. The only thing is, the colors are not Pantone colors in the file but rather, a mix.

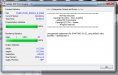
Also, in the Quickset settings, 'All ICC profiles On' is selected and 'Use spot color replacement table' is unchecked.

Another question, even if it were a Pantone color, as long as the 'Use spot color replacement table' box is not checked, the colors should be able to be changed, correct?

Does anyone have any insight into why this may be happening based on the info laid out here?
 

Matt-Tastic

New Member
change to "All ICC Profiles off", change your spot in the original file to a cmyk blend (as opposed to a named spot) and see if that makes a change. if not, make a separate file with multiple versions of the color you are looking for, and use that one in the file.

If ONYX doesn't want to do your work for you, then make your Design program do it.
 

IronHawk

New Member
Thanks for the reply.

I've been getting around it by having the guys in preflight sub in a mix for the PMS color instead, but it doesn't make it right. I was curious to know if anyone else had run into this and come across a solution to the problem as opposed to a workaround. Even ONYX tech support didn't know...

I appreciate your taking the time to answer though.
 

DIGIXTRA

Digixtra
From my experience Wasatch is a much superior product. It may not have some bell & whistle but it is easy to operate and the Rip is FAST. I have been using the Onyx since day one ( which is called EZ... ) and had gone throu a lots of tech support with Onyx. The first thing they always insist that it is your problem and you don't keep it up-to-date software (meaning you are not paying for the upgrade blah blah...) Anyway... try to rotate a big Tif file in Onyx and compare to Wasatch and you will see...
My 2 Cents.
Kent T.
 

dlndesign

New Member
Having the same problems through Onyx and I have a Seiko also. We've tried the tiff option to get around this until we actually have time to do some detective work on it. But its seems to be a relatively new issue for us, within a month. But before that there really wasn't any issues that we had happening like this. We do have a cutter that we need to have registration marks made for, so the tiff process does take more time but its a more bullet proof option than hoping that this time the rip wont kick it back and cause us more headaches..
 

SignMeUpGraphics

Super Active Member
Argh, I'm getting this issue with 10.2... has anyone found a solution?

I spent a good few hours pulling hair out trying to work this out.
 

OnyxDoug

New Member
Hi All,

There were situations where the rip in v10.x would fail on spot color replacements, these issues were resolved with rip updates in v11.x. However it's possible something else is happening in your particular situations.

If you are having difficulty with a single named spot color replacement you could try turning off the spot color table and instead using the "Color Replacement" option as a workaround. Please be aware it's challenging to provide a solution without the file in-hand, but I'll give you some information that may help.

For clarity there are two distinct color replacement options in Onyx
  • "Color Replacement" (non spot color) - If you attempt to replace a named spot color (e.g. PANTONE) using this method and the Spot Color Table is enabled, ripping the file will undo the replacement. This option is for replacing process colors (non spot colors).
  • "Named Color Replacement" - This tool will list all of the spot colors in the file (even if they are custom) and allow you to replace them, you should be using this option. If this tool is disabled it indicates there are either no spot colors present within the file or the spot color table is currently disabled.

**The "Use Spot Color Replacement Table" setting is accessible by editing QuickSet, or from the "I" info button in Job Editor (PS/PDF Options tab)

Other considerations, specifically from the original post; "the colors are not Pantone colors in the file but rather, a mix" This comment suggest this may not be a solid fill, perhaps a gradient or transparency blend? If so, it’s likely to cause considerable confusion for the rip as to which color you are trying to replace. If one of the mixed colors is not a spot color it adds additional confusion, as does transparency blending of colors.

Again, if simple named spot color replacement of individual named spot color fail and the above options do not work, the issue is resolved in version 11.x

I realize any discussion of upgrading is never an ideal way to resolve an issue, so its my intention that by explaining the different color replacement options I've given you some alternatives to explore.

Best regards,
Doug
 

SignMeUpGraphics

Super Active Member
Thanks Doug,

The reason we were trying to do the spot color replacement is that we received a 98 page PDF from the client, everything in one single Pantone color and wanted to do a spot replacement to turn it into our White channel so we could print an underlay onto glass before printing the actual Pantone over the top.
We still haven't worked it out, but it would save a lot of time compared to re-working the PDF after the client provides it to us. We're more of a production place than design centre, hence the look for a quick fix to this situation.

Definitely tried the Named Color Replacement, but when it came to RIP time, it would throw an error as follows:
attachment.php


Is this the 10.x bug?
 

Attachments

  • Spot-Colour-Replacement-Error.jpg
    Spot-Colour-Replacement-Error.jpg
    73.7 KB · Views: 1,334

OnyxDoug

New Member
Excellent, thank you for the clarification. The good news is I don't believe this is bug related, but I'm admittedly uncertain what that rip error means (our support guys likely know).

More good news...
There are a couple of ways to approach what you are trying to do. Some of this will depend upon how the printer handles layering, but I'll assume white can be applied either as a distinct layer, or by using staggered heads to get some curing of the white prior to laying down the CMYK.


I would approach this in the rip as follows.

  • In Job Editor, go to the "Color Correction" tab, select "Tools", "Spot Layer Tool"
  • Click the check-box to "Enable Spot Layer Tool"
  • Make sure "Media Color Handling" is set to "No Knockout"
  • Select "Spot1" from the "Spot Channel" pull-down menu (or whichever channel represents your white ink)
  • If you want to fill the entire image frame (art board) with a layer of white, simply click the check-box that says "Flood Fill (lock sliders)" This will fill both pixel and non-pixel (glass) with 100% white
  • By unchecking the lock sliders check-box you can individually control the amount of ink under the pixels (Underlay Fill) and the white on the bare glass (Mask Fill).


If you have multiple objects (pixel data) and only want to under fill certain objects, the procedures get more involved and it works best if the objects are solid fills. Please understand this can get confusing and depending on the complexity of what you want to do it may be better done in a graphics application such as Adobe Illustrator.


In this case you would

  • In Job Editor, go to the "Color Correction" tab, select "Tools", "Spot Layer Tool"
  • Click the check-box to "Enable Spot Layer Tool"
  • Make sure "Media Color Handling" is set to "No Knockout"
  • Select "Spot1" from the "Spot Channel" pull-down menu (or whichever channel represents your white ink)
  • Click the arrow on the "Set mask" button and choose "Pick Color"
  • Use the color picker to select the pixels you want to underfill with white, you'll see the display color of the "Set Mask" button change to the selected color.
  • Now you can use the "Mask Fill Opacity" slider to add the white ink under the masked object.
NOTE: having changed the "Set Mask" color from the media white, the "Underlay Fill Opacity" slider will now fill everything else.


Finally, if your task is more complicated or you are willing to make the edits to the file using Illustrator
I would suggest using overprint to accomplish the same thing.

  • Overprint is enabled/disabled in the Illustrator "Attributes" Tool (Window>Attributes)
  • Make an object for your white sized to accomplish what you want. This should be filled using a custom spot color named "Spot1" (without quotation marks)
  • Place this below the pantone filled object in the Layers structure
    [*]Open the Attributes tool
    [*]Select both the Spot1 and pantone object sand click "Overprint Fill" check box.
    [*]To preview how this will print, go to View>Overprint Preview


I'll try and attach a screengrab to show the AI set-up with overprint (top example) and without overprint (lower example)... In the examples, Spot is represented in green.
attachment.php

Also, you can view a video on Spot Layer Tool basics here: https://www.youtube.com/watch?v=4tXsInxBnUY


Regards,
Doug
 

Attachments

  • overprint.jpg
    overprint.jpg
    77.3 KB · Views: 1,221

SignMeUpGraphics

Super Active Member
Doug,

I must commend you on your stellar post. The instructions were extremely clear, and we can now achieve our goal quickly using Onyx 10.2 without editing the source files.
The only catch I have found is that after you configure the color replacement, you actually need to go back to the Preview and Size tab page and click the Apply button so the changes take affect.
If you click the Submit button on the Print tab page right after the color replacement, Onyx "forgets" to apply the changes to the file before RIP-ing.

Many thanks for the thorough post. It will save many hours on future jobs.

Simon.
 
Top