-
I want to thank all the members that have upgraded your accounts. I truly appreciate your support of the site monetarily. Supporting the site keeps this site up and running as a lot of work daily goes on behind the scenes. Click to Support Signs101 ...
You are using an out of date browser. It may not display this or other websites correctly.
You should upgrade or use an alternative browser.
You should upgrade or use an alternative browser.
trailer rivet question
- Thread starter gabagoo
- Start date
GAC05
Quit buggin' me
I think it depends on the shape of the rivets/screws.
We did partial wraps on some Kenworth tractors.
It had two different types of rivets. The regular low profile rivets worked fine doing the channel Rolle-Pro method without primer 94. Along the bottom of the door jam there are larger rivets that hold the skin onto thicker support brackets. These have a higher more rounded profile on the head that would not stay stay down no matter what we did. Tried with and without p94, rollie-pro channel and even the old school 3M rivet brush method. Would look good after post heat but after a few days would start to tent. The normal rivets in the same area did not lift at all. Material was a fresh roll of 1080 gloss red.
In desperation we trimmed them at the base & added a cap by plotting a bunch of dots that when heat set just overlapped at the base of each rivet head. Looked good but I am not over confident with the long term durability with those cabs getting pressure washed each week.
rydods
Member for quite some time.
I take them out whenever I can. My minimum wage worker/my son can take them out and put them back in and I don't have to use cast vinyl and lam. Seems like a no brainer to me. I will, however, ask the customer what they would prefer first. If they want me to go over them I will. They usually tell us to do what we think is best.
Texas_Signmaker
Very Active Signmaker
How do you deal with the silicone along the top of the trailer where the aluminum panels meet the raw aluminum trim.
'
Not sure if it's the right way or not...but I trim it so it doesn't sit on the silicone.
Jeff grossman
Living the dream
Manuel Upton
New Member
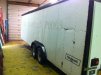
This is a before and after of the only trailer I've ever left the screws in. That's only because it was a 1985 and we couldn't get the screws out. We did this back 2012 and it still looks great.
Attachments
What do folks think of this tool? My biggest worry would be that by cutting the vinyl, you're adding the potential of the little cap covering the rivet pulling off.
https://www.fellers.com/fellers-sho...ols/set/rollepro-precision-rivet-cutter-heads
https://www.fellers.com/fellers-sho...ols/set/rollepro-precision-rivet-cutter-heads
kcollinsdesign
Old member
If you are using cast vinyl with laminate, a good solution for going over rivets is priming first with 3M Primer 94. Squeegee up close the rivet, then heat to 180º f (I use a propane torch, but you might start with heat gun. I also use an infrared thermometer, the temperature is critical). At 180º f the vinyl will lose its "memory" and cool down to its new, distorted shape. Usually, two applications of heat will allow you to squeegee right up to the edge, with little chance of the vinyl stretching back and tenting over the rivet. The biggest mistakes I see are over heating, which will make the vinyl brittle, and under-heating which will not allow the vinyl to reform into a new shape (lose its memory). You are not trying to "melt" the vinyl into shape, rather you are "re-forming" the vinyl so that it has the correct shape to cover the rivet.
Texas_Signmaker
Very Active Signmaker
If you are using cast vinyl with laminate, a good solution for going over rivets is priming first with 3M Primer 94. Squeegee up close the rivet, then heat to 180º f (I use a propane torch, but you might start with heat gun. I also use an infrared thermometer, the temperature is critical). At 180º f the vinyl will lose its "memory" and cool down to its new, distorted shape. Usually, two applications of heat will allow you to squeegee right up to the edge, with little chance of the vinyl stretching back and tenting over the rivet. The biggest mistakes I see are over heating, which will make the vinyl brittle, and under-heating which will not allow the vinyl to reform into a new shape (lose its memory). You are not trying to "melt" the vinyl into shape, rather you are "re-forming" the vinyl so that it has the correct shape to cover the rivet.
Exactly.. 3M training taught me to use a temp gun to check and make sure you get it to 180, but over time I learned how to visually see the vinyl change shape once it hits 180. I've had to redo panels that I already heated around rivets, and when you pull it off the little "bumps" retain their shape.
gabagoo
New Member
I would love to hear the techniques people use to go over a line of rivets. I have no idea how it is done without getting the vinyl to bunch up creating those tiny wrinkles. Do you heat the area first before applying pressure. I even get the wrinkles using a foam roller I bought specifically for that purpose. Drives me mad.
Texas_Signmaker
Very Active Signmaker
I would love to hear the techniques people use to go over a line of rivets. I have no idea how it is done without getting the vinyl to bunch up creating those tiny wrinkles. Do you heat the area first before applying pressure. I even get the wrinkles using a foam roller I bought specifically for that purpose. Drives me mad.
I skip over the rivet creating a tiny air pocket and then go back over it popping it, heat it and form over the rivet. If you're using the proper cast material along with lamination this really is not an issue with wrinkles. If you do see a wrinkle starting to form, use a little heat to work it out but be careful not to make it worse. Just takes some practice.
I would love to hear the techniques people use to go over a line of rivets. I have no idea how it is done without getting the vinyl to bunch up creating those tiny wrinkles. Do you heat the area first before applying pressure. I even get the wrinkles using a foam roller I bought specifically for that purpose. Drives me mad.
I leave the rivet line in a tunnel about 3/4 of the width of the roller I'm using, work from the middle out in one direction at a time. I've switched to torches (much faster to get the temp needed and no cords) for truck/trailer installs, kiss it with heat and roll. If it doesn't conform properly, but you've sealed it in, poke hole with air release tool at the top for the top half and bottom for the bottom half, kiss again and roll. Though after some practice you won't need to go over it more than once (aside from postheating). You'll be able to tell visually when you're at the right temp to hit it with your roller. Also work in sections, don't try to heat the entire line first and go over it, you can run into issues. Basically quick heat, roll over a couple rivets, quick heat, next couple rivets. It's really quick once you get a feel for the rhythm and much faster with a torch if you're comfortable with one.
When I ran into the most problems was trying to roll and heat at the same time with a heat gun when I first started, it always overheated the vinyl after a foot or so.
My thoughts are, I'm wrapping a trailer for my customer, the customer and myself should understand anything over 5 years is beyond expectations. I plan on doing good work and providing good service and having repeat customers. I am not taking extra time to remove and reinstall screws from their trailer, risking striping the heads or the wood or aluminium they are in. Also when the trailer comes back for removal It's going to take a lot longer, costing my customer more money in the long run (and for the initial install), not to mention **** off my employees or myself. I would say the only thing they would be gaining with removing screws (and this could be argued) is it looks better within five feet, which is not the intended viewing distance. Wrapping over the screws with the right material and proper prep and installation, it will be a faster install, look great for years, remove much faster, and cost the customer less.
So green. There is no "right material" for those screws. Wrapping over them only creates fail points, dozens of them.
The aluminum won't allow for it anyway most of it is no thicker the .040 hell I even seen .032 on the cheapo trailers and doesn't stay straight in the sun.
An experienced sign guy keeps extra screws on hand along with the knowledge of how to drill one out and replace it if need be. Real world stuff ya know??
SightLine
║▌║█║▌│║▌║▌█
Removing the screws is really not a good idea. They are self drilling screws. When you remove them the drill tip makes the hole a tiny bit larger and will never hold again as well as it did the first time. They then start to get loose over time. I've seen a trailer where all had been removed twice and you could push on a corner of the trailer and the entire wall would tilt move around. They ended up going around the entire inside and adding an adhesive along all of the frame to panels joints and bought a thousand or however many one size larger screws to fix it and make it safe to use again. Just like rivets, if properly put down a wrap over the screws stays down just fine. I know many will still remove them though which is certainly an option. Just not an option we use.
gabagoo
New Member
I removed every screw that got in my way and they all went in perfectly and tightened well. This was a new trailer. The screws never spun the vinyl although I know what your saying as I have seen that happen with individual letters...wrap is a little different. Graphic looked great and the customer was happy.