SignMeUpGraphics
Super Active Member
Oh wow, another flatbed cutter! Those probably cost more then we make doing this hobby sticker/decal stuff in a year!
Approx. $150k for a ProCut installed.
Oh wow, another flatbed cutter! Those probably cost more then we make doing this hobby sticker/decal stuff in a year!
And the rest. They aren't for hobbyists.
If you are serious about reducing your print finishing time they are a great investment though.
Bugley1 thanks for the info, such a simple idea too! I'm going to grab another blade holder and try this out.
Also going to try and kiss cut and perf cut from option 3 too and see if I can get that working.
You're welcome, also when i do perf cut i use a 60 degree blade that i leave in the 2nd holderBugley1 thanks for the info, such a simple idea too! I'm going to grab another blade holder and try this out.
Also going to try and kiss cut and perf cut from option 3 too and see if I can get that working.
You're welcome, also when i do perf cut i use a 60 degree blade that i leave in the 2nd holder
Wow, what a frustrating day. I spent the last 5 or 6 hours with the FC8600 testing perf cuts and such, and the only feedback I have at the moment is THANK GOD for my Summa.
I am getting inconsistent results. If I send a row of 3.5" x 5" boxes that have just a perf cut line around them, I'll get some lines that cut all the way through the material, elsewhere in the row I'll get a box or two that has a cut that only scored the vinyl and not the backing. If I send it again, same thing just on different boxes.
Any ideas what else I can try? I have it all working, 2nd holder with 60 degree blade, perf cuts sending just fine vs a contour cut, yada yada, just no consistency on the perf cuts through 3 different vinyls GF 202, Ora 3165, and Arlon 4500.
We have two of the Royal Sovereign electric trimmers and cut tens of thousands of stickers each year. Those electric trimmers are invaluable to us but also total pieces of crap. If you get one buy the extra warranty. You will use it. Stupid expensive for something that is continually falling apart. I suppose we could buy the hand trimmers but I don't think we could keep up.
Hi,We have two of the Royal Sovereign electric trimmers and cut tens of thousands of stickers each year. Those electric trimmers are invaluable to us but also total pieces of crap. If you get one buy the extra warranty. You will use it. Stupid expensive for something that is continually falling apart. I suppose we could buy the hand trimmers but I don't think we could keep up.
In our summa, when that happens we replace the teflón line where the summa cuts. Its not usually a problem with the BladeWow, what a frustrating day. I spent the last 5 or 6 hours with the FC8600 testing perf cuts and such, and the only feedback I have at the moment is THANK GOD for my Summa.
I am getting inconsistent results. If I send a row of 3.5" x 5" boxes that have just a perf cut line around them, I'll get some lines that cut all the way through the material, elsewhere in the row I'll get a box or two that has a cut that only scored the vinyl and not the backing. If I send it again, same thing just on different boxes.
Any ideas what else I can try? I have it all working, 2nd holder with 60 degree blade, perf cuts sending just fine vs a contour cut, yada yada, just no consistency on the perf cuts through 3 different vinyls GF 202, Ora 3165, and Arlon 4500.
I have been wanting to try this, but am curious doesn't it tear up the teflon strip and blade? Thank you in advance for any advice. (Roland XC-540)
No in the plotters that do this you have to change the blade to a different part of the holder and it cuts it out over a gully so it never comes into contact with anything on the other side of the material. Graphtec has some videos for this process.
Summa perf cuts right over the strip. It does chew it up, but from what I heard it doesn't chew it up so much that it's a problem, though I only have a graphtec so I can't comment on it.
I just did 22,000 decals, all various sizes perf cut on the graphtec. Everything cut perfectly... Took a few hours, and it did it while I was printing / laminating and flatbed printing... So took no effort out of me, except every 30 minutes I went and hit send in onyx to cut the next set.
Much, much better than a straight edge. I'd say maybe 100 of the smaller ones went out of alignment, sounds like a lot... But out of 22,000 , the hours it saved me is worth the $20 in extra material used.
I use a Graphtec as well as a Mimaki CG (for my wider jobs), I've never been able to get either to cut PERF cuts well...what's your secret? Mine will generally track off somewhere or some will perf cut properly and others not all the way through...0.o
Ok, under cut line pattern I use -
Up Mode = 2. This is the setting I found to be the best, and what really made a difference for me in smooth cuts.
Cutting Pattern is 0. Depending on the media, you'll want to change it out.
I also find if you're cutting uniform shapes, like rectangles, it's best to set them up as full lines rather than squares - It makes the plotter move less, which leaves less chance for it going off skew. I'll upload a sample file -
Uploadfiles.io - Sample cut file.eps
For any long lengthwise lines, I seperate into incremental lines, it seems to help. So It'll cut all the vertical lines, then once it's done it'll go back to the beginning and cut all the horizontal lines (Horizontals are setup in 1 full line). I do it this way with 3-400 1-2 inch squares at a time, and it never tracks off.
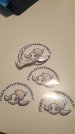
For non uniform shapes, like the turtle... I generally leave a quarter inch of space inbetween. Everything is setup as a single cut, and I haven't had many problems with them. Usually I don't do diecuts that arent shaped like a rectangle though - So I follow the above approach, and its easy.
This picture is about 1000 4 inch square decals with rounded corners. You can see the clean cut on it.
It takes a lot of experimenting - Grab some scrap material of whatever your cutting and play with it. Change the up / down distance, change the blade length... etc. The first 12,000 decals I did were hell. It took 3-4 people to pop them out over a few days... I didnt quite cut through the backing. It took some experimenting to get the settings perfect... But now with zero waste since I gang them all up, it does half as many cuts since theres no space, Theyre usually grouped in 50/100 sections so I can pop a section out, tear all the stickers apart and elastic it without the need to count... And it takes me maybe 30 seconds to pop out 100 decals, since I just tear it in half, put them together, tear in half.. put together, tear in half... until its down to 1 decal. Really easy and simple. And the customer loves how accurate it is, and pretty much trippled their order since we stared doing it this way. Before we used a guillotine and the operator would mess some up, and they'd never be perfectly even.
Also.. for blade depth, Fold the vinyl into an S shape. So it's 3 layers, run your blade over it so it cuts through the first layer, and just knicks the second layer... Then the blade depth is good. I find after that, you only need to make slight turns to ensure it's perfect.
I also change the blade for every batch we do... Cutting through paper dulls the blade. I'm sure it'd be fine to keep going... But we buy packs of blades for $.50-1 per blade. So I switch it out after every huge order. If youre only cutting a couple hundred you should be fine... But once you get into the 10-20,000 orders, spend the buck and put a new blade in.. it'll make for a cleaner cut.