• I want to thank all the members that have upgraded your accounts. I truly appreciate your support of the site monetarily. Supporting the site keeps this site up and running as a lot of work daily goes on behind the scenes. Click to Support Signs101 ...

Looking for Help Falcon 2 "Head Overcharged" 075 code...

onlyjames

The World Is Never Enough
Hi all, Im certain that I have caused this problem myself, I cant seem to let something be until its perfect....and I often make things worse.

Everything was running ok, but I wanted to align the print heads perfectly, so I started making adjustments ect ect.

Somewhere along the line I stopped getting black to print, and eventually found that the print head was leaking air somewhere, I pulled the print head out and tried putting it back in and pulling ink through the lines a couple times, no luck. Actual print head was leaking air (Explains the ink on the print head I noticed at first). Then, I try one more time, and I got hit with the "head overcharged 075" code...everytime I tried to do a nozzle check.

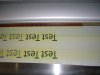
I put in an old print head and the problem seemed fixed, so I started a test print and half way through I got the same message.

I am running around in circles here, and I need some major help before I fry something over here.

Is there a way to pinpoint what is causing the error?

Thanks again to everyone, you all are always so helpful and nice.

THanks, James :thankyou:
 

onlyjames

The World Is Never Enough
EDIT::::::: HEAD OVERCURRENT...not overcharged, haha

I have ordered new head cables, in on tuesday.

When I came in today the printer ran fine, then I tried putting the newer print head back in and got the same overcurrent message, then put the old one BACK in, printed something fine, tried a nozzle check....and ERROR again.


There is a possibility that it may be the Yellow cables, I pulled one out, it was very dirty, I cleaned it, and while cleaning it the blue backing fell off...I tried putting it back in and now I get the error message as soon as the printer turns on.


I just want this thing running, its killing me. And now I have to wait until Tuesday.

Any thoughts/suggestions in the mean time would be GREATLY APPRECIATED

Also, if anyone has anything specific that I can look for, or test please let me know.

All I want is the printer to run correctly, which it was before I tried to straighten the black print head 1MM!!!! Im so pissed

Is there a way to check to make sure the CR board and Motherboard are safe??

Thanks for listening to my crap
 

Stealth Ryder

New Member
Maybe this will help...
 

Attachments

  • E075.jpg
    E075.jpg
    69.2 KB · Views: 72

onlyjames

The World Is Never Enough
Maybe this will help...

Yeah, thanks, I actually have some new cables on the way....Im afraid the print head is damaged....I sure hope not. Im kind of in panic mode now until I find the solution....hopefully just the bad cables?? The yellow print head cables looked in pretty bad shape, I removed the cable, cleaned it off a bit, let it dry, and when I installed it again the yellow print head was printing yellow non stop??Hopefully that yellow cable is just broken, and the new cables will take care of the prob...QUESTION.... How durable are the print heads?? what does it take to actually damage a print head electronicly? Im trying to retrace my steps to see if I could have done any actual harm to the print head....Im hoping to save the black print head...Its still very new and Im hoping I dont have to buy a new one!!
 

onlyjames

The World Is Never Enough
Pic of print

So, here is the print Im getting, just before I recieve a "Head Overcurrent" error.

The printer starts up just fine, initializes ect ect, but as soon as I run a print....this is what I get, and then immediatly a error.

I have put new head cables on the black and yellow print head...
 

Attachments

  • Print.jpg
    Print.jpg
    25.8 KB · Views: 104

onlyjames

The World Is Never Enough
Something Else I just noticed, one of the yellow dampers is almost completely full, then I started looking at the other colors, and one of the Magenta's and both of the Cyan's are almost completely full of ink...not sure, but arnt they usually about 3/4 full?

Please help! thanks to all of you
 

randya

New Member
This does not look good.

Post some additional pics of anything that will print.


This looks like parts of the yellow print head are firing, and firing all the time.
That is not a good sign.

I have somebody that I want to see more pics of tomorrow.
 

onlyjames

The World Is Never Enough
awww, man, I finally thought my bad streak of luck had ended....now, the one person I trust with this more than anything says "that is not a good sign"....owwwww, that hurts.

Can you please just tell me its gunna be ok? I cant take much more crap!

ha ha, my crapy weak...first this printer, then my yamaha generator, then my bike, and my fridge at home.....AND the Furnace at my house!!!! I believe Im due some good luck by now!!!

Thanks Randy, I"ll try to get it to print some more, and I'll take some pictures of the dampers and everything else.

Thanks again, I do appreciate all the help, from everyone!
 

onlyjames

The World Is Never Enough
This does not look good.

Post some additional pics of anything that will print.


This looks like parts of the yellow print head are firing, and firing all the time.
That is not a good sign.

I have somebody that I want to see more pics of tomorrow.

Here are some more exciting pictures for you. First, the two that say "test" they actually printed all the way through, no errors...but you can see the yellow.

Then, the second print (darker print), it was only about 15% through the print and it gave me the e075 error.

hmmmmmm, I have such a bad feeling about this. I dont understand what could have gone wrong.

Please let me know what you think of the pix.....I can always take more or close ups of any part of the printer.

Thanks so much
 

Attachments

  • CIMG2896.jpg
    CIMG2896.jpg
    41.4 KB · Views: 80
  • CIMG2897.jpg
    CIMG2897.jpg
    44.6 KB · Views: 89

randya

New Member
OK, I had my tech look at it.
So maybe it is not so bleak....maybe

Probably one of 3 items
1. Head cables - which you already changed
2. Umbilical cables - yes the long ones that run along the ink lines.
3. Head


2 things:

If you got ink down in the head, that could be your problem.
Get a BRIGHT LED light, turn the machine off and remove the head cable.
if you have yellow ink in the head and on the cable you should be able to see it with the LED light.

If every thing is clean, you can swap BOTH cables AT THE SAME TIME with one of the other heads, if the problem stays with the head, then you have identifed the problem.

If it moves with the cable, then you may have to ohm out the cables on that channel...

Of course if you have a more serious problem you could damage another head...

GOOD LUCK!


There are many times where having a trained profession service your equipment can save you money, as well as time and frustration.
 

onlyjames

The World Is Never Enough
Morning Randy! Im going to take a look.

I'll report back soon, I believe I did see some yellow ink below...looked like new ink.

What do you think about the dampers being so full on several of the print heads? They are almost 100% full.....
 

Graphics2u

New Member
Iknow there is obviously a problem with the yellow because of the print. But is there a way to tell from the error code which head is the problem?

Because weren't having issues with the black also?
 

onlyjames

The World Is Never Enough
Yeah, initially it was the black print head that I was trying to adjust, it was off by about 1mm. It all started with that print head......first I got a head overcurrent message, then all seemed fine, then I noticed the head had no suction and it appeared to be leaking slightly. I tried swaping the print head cables with the yellow print head (a known good print head) then all hell broke loose with the yellow print head....

Yeah, is there a way to tell which head is the problem? and is there a way to test a print head?

Thanks!!
 

onlyjames

The World Is Never Enough
Hey Randy, Something to note, when I changed the yellow print head cable for the first time, there was yellow ink on the cable, and on the plug area of the cable. I cleaned it with alcohol, but the cable was so old it started to fall apart, thats why I bought new cables.

So, at some point, there was yellow ink on the cable.

Im pulling the cables now to take a look at the plug...
 

onlyjames

The World Is Never Enough
Is there a way to clean the Head Cable Plugs on the actual print head? The yellow print head plugs are VERY dirty....ink all over them. Kinda hard to tell if yellow is in there, but because the old plugs had yellow on them I have to assume that yellow ink has gotten in the plugs at some point...
 

onlyjames

The World Is Never Enough
OK, I was able to get a look inside the yellow Print head cable connectors. I got down about eye level with them, and hit them with my LED light, and YES, on the right hand side connector I can see yellow inside the connector. They are both very dirty on the outside, but on the left connector I see the metal inside for the head cable to connect to, and on the right side I can definatly see yellow.......is there a way to clean that? Inside?
 

randya

New Member
I am not aware of how to clean.
My concern is that it is shorting out or interferring with the connection.

Gotta be some sparkies out there who might have a idea on cleaning.
 

onlyjames

The World Is Never Enough
I guess I can just jam a xacto blade down in it and dig around the connector, that should loosen up some of the ink, ha ha ha

Does anyone know if Isopropyl Alcohol will damage the print head if I pull the print head and clean with it?

Thanks
 

randya

New Member
be careful with a blade, maybe a plastic dental floss pick.

I dont believe that alcohol will damage the head, make sure it is DRY before reassebly. But use sparingly and dont let it sit. Remember, I said 'believe'....

We are in uncharted waters....
 
Top