• I want to thank all the members that have upgraded your accounts. I truly appreciate your support of the site monetarily. Supporting the site keeps this site up and running as a lot of work daily goes on behind the scenes. Click to Support Signs101 ...

Need Help VP 540i Distortion, Double Printing, Wavy Edge?

player

New Member
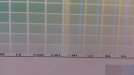
I am having trouble getting a good print. Here are photos from a 48" x 16" Pantone chart I printed as a test. The left and right edges are wavy and distorted. There is a row about a foot in that things get scrambled along. The #17 is black and it prints that plus a ghost #17 1/4" away in red. The swatches are all scrambled and goofy running down the print in that one area. The lettering at the bottom of that area is
also all scrambled.

Any ideas?


20191124_140235.jpg


20191124_140325.jpg


20191124_140235.jpg


20191124_140436.jpg


20191124_140147.jpg
 

Attachments

  • 20191124_140452.jpg
    20191124_140452.jpg
    681.3 KB · Views: 191
Last edited:

Malkin

New Member
Very likely an issue relating to the encoder strip, or it's sensor.

We cleaned and cleaned and eventually replaced our strip and still had issues. Turns out that our VP-540 makes more overspray than most (according to tech) and the sensor was covered in ink. Tech changed it out and it's been fine ever since. That was at about 7-8 years old, it's 11+ now.
 

JKstorm

New Member
I realize this is an old thread but this problem was new to me. I have a Roland VP 300 that I have been using for years. I was happy with the print quality until this issue came up. Cleaned the encoder strip with alcohol pads CAREFULLY. This did not fix the problem but the print did improve slightly. Cleaned it again and it was better yet. What I did notice was this. I entered the service mode and ran the linear encoder setup after each strip cleaning. Not sure if that helped but I did notice that when it was completed I ended up with a higher number. Went from 18 to 24 on my last cleaning. Just a note that if you run the encoder setup remove the material clamps and extra pinch rollers and slide the main ones all the way left for the left one and right for the right one. Also, on my final cleaning I pinched the strip from both sides and gave it a little more of a tight pinch and slid it down the strip. Suprizingly the pad showed a good amount of brown so there was more contaminant on the strip. Anyway, prints are nice and crisp again. Back to work! (letters in images are 1/4" tall. I rotated the images 90° so the letters were printing sideways and right to left single pass)

Jack
 

Attachments

  • Before.jpg
    Before.jpg
    131.8 KB · Views: 21
  • After.jpg
    After.jpg
    327.2 KB · Views: 21
Last edited:

Jim Hancock

Old School Technician
You are on the right track, but using the wrong liquid. This is the best way to do this. You will need gloves, a clean microfiber cloth and acetone. Yes, acetone... It will not damage the encoder strip in any way. 91% alcohol is ok, but doesn't get all the ink off, while acetone will. NEVER use alcohol less than 91% as the water content in 70% alcohol will soften the emulsion on the encoder strip (it's a piece of graphics film) and can damage it. I have cleaned hundreds of encoder strips with acetone and never damaged one.

Enter the maintenance mode. Select cleaning so the print head moves to the other end of the printer. Power off the printer with the main switch in the back of the printer. You can now freely move the print head so you can get the entire strip.

Cut several 2 inch squares of the microfiber cloth, wet it with acetone, and fold it over the encoder strip and wipe the stripe gently using your thumb and forefinger to hold the cloth against the encoder strip. Do this several times with a new square of cloth until the cloth is clean. When done, power up the printer, the head carriage will make its way back to home position on its own.
 
Top